I love using hand-me-down furniture in a space, even if it’s not all my ideal style. I love it because of the history and the story it tells – or the stories you can imagine it carries with it.
As I finally finished a few projects for the serger corner of the Janery sewing studio this weekend, I realized that they all had come from my parents’ basement. I never intentionally planned that they would live together in the studio. What a fun coincidence!
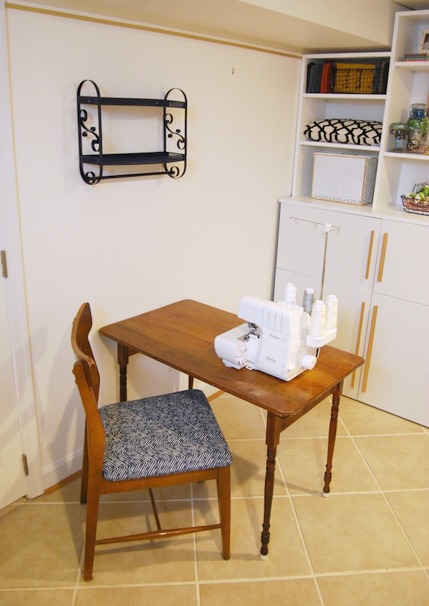
I brought these three pieces home in the fall – the chair, sewing table, and wall shelf – with no plan other than the desire to rescue them from storage. It was about damn time I put them to use.
The Metal Wall Shelf:
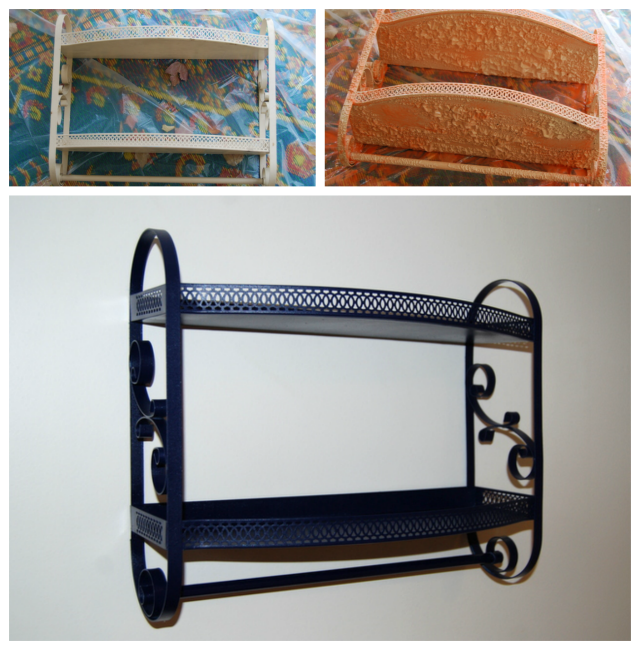
The shelf is no longer staying here on the wall. I though it would be useful, but now that it’s hung, it looks too puny for that space. I’ll probably move it to my guest bath.
For my entire childhood this shelf hung on the bathroom wall. It was a worn-out beige, with baby blue hiding underneath. I stripped it down using Citristrip. So much fun to watch the paint wither up and fall off! Then I painted it a glossy navy.
The Chair:
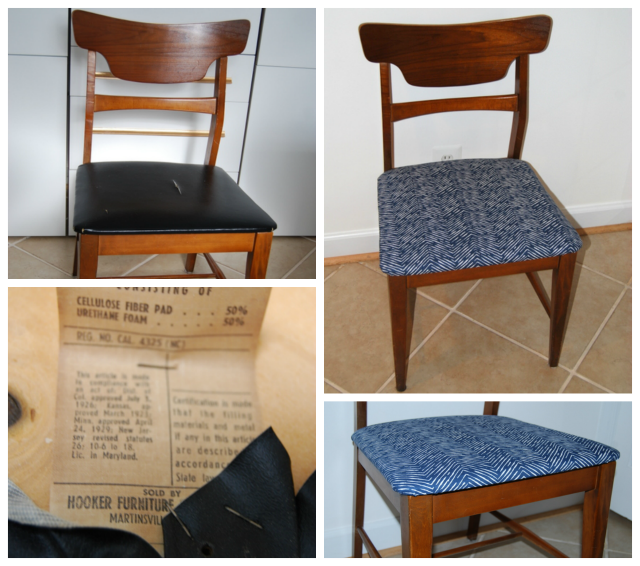
It’s a solid, vintage piece (maybe mid-century?) by Hooker Furniture. The finish is worn but not terrible, so it just needed new fabric on the seat.
I pulled out all the staples and removed the vinyl in one piece. The foam and plywood were both in good condition, but I added a layer of thick quilt batting for just a little more cushioning. Then I wrapped the seat in the new fabric, a navy and white herringbone.
The Sewing Table:
I saved the best for last! I’ve always loved the unique look of this folding table, with its awesome 1-yard ruler branded on it. The underside is stamped Washington, DC. Welcome home, little table!
And guess what? It turns out that this table was most likely made between 1875-1890. I freakin’ love that. I wish I knew its story.
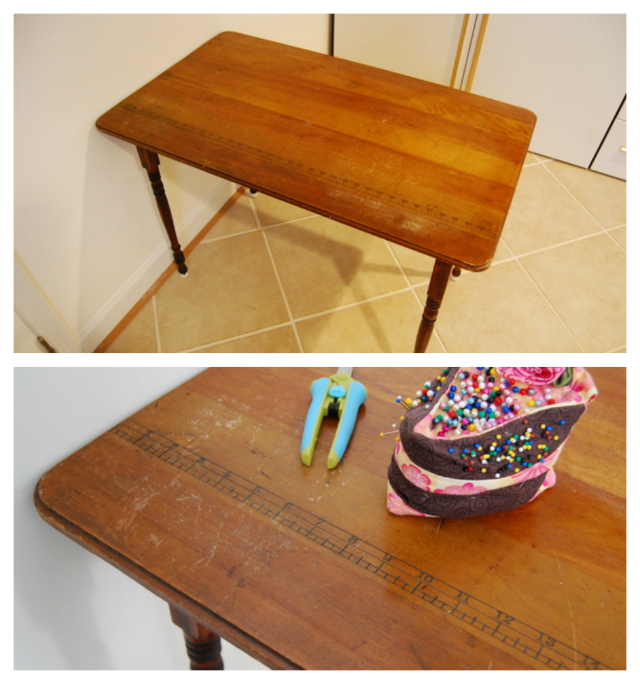
I grew up wanting to use the table as a desk, but was unable to because it was too short. Someone had cut the legs shorter a long time ago. I brought it home thinking that I’d replace the legs, or make them longer, but it turns out that the height is just right when I’m using my serger. It’s high enough that I can still sit on the chair and slide under it, which is all I need.
After learning that the table is a collectible antique, I’m not going to modify the legs or refinish it for now. If and when I do so, I will seek guidance from a professional so that I do not hurt the table’s value.
Now there’s only one corner of the room left in this makeover, and it poses the toughest challenge. I’m converting my 7 x 4 foot sewing table to a drop-leaf table. Wish me luck, and I’ll report back next week at the latest.
*Shared in the Vintage Revivals “Rock What Ya Got” party.
In case you missed it:
- Studio Makeover, Part 1: Removing Temporary Wallpaper
- Studio Makeover, Part 2: Embrace White Paint
- Studio Makeover, Part 3: A Shelving Fail
- Studio Makeover, Part 4: Shelving Dilemma
- Studio Makeover, Part 5: Another Shelving Fail
- Studio Makeover, Part 6: Custom Shelving
- Studio Makeover, Part 7: Shelving Progress
- Studio Makeover, Part 8: Completed Built-Ins
- Studio Makeover, Part 9: Unifying the Cabinets
- Studio Makeover, Part 10: Perfecting the Faux Built-Ins
- Studio Makeover, Part 11: DIY Gold Cabinet Hardware


2 Comments
[…] Studio Makeover, Part 12: Furnishing my Serger Corner […]
[…] For my serger corner, I found an antique sewing table and chair in my parents’ basement, and recovered the chair. I painted the artwork frames with gold leaf […]