

I recently tried a project I saw on Pinterest – dyeing a thrifted wool rug to make it less ugly and more awesome, in an attempt to have a budget-friendly large rug for our basement TV room. I had mixed results, which I imagine is often the case when a budget-friendly solution seems too good to be true.
If you want to see my pros & cons list, skip to the end of the post. 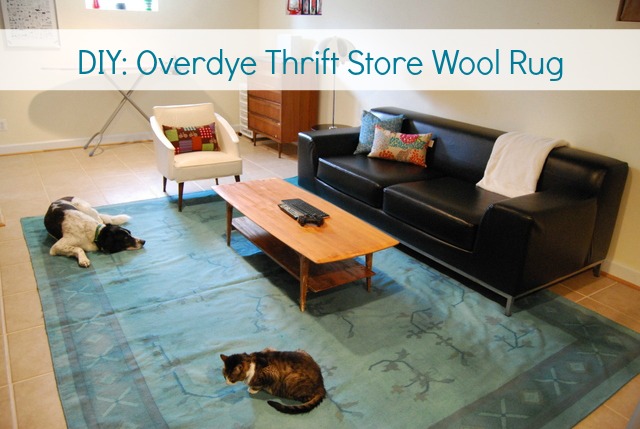 It all started when I scoured Pinterest for budget-friendly DIY rug ideas. One idea I stumbled onto was the overdyed rug, where you take an ugly old natural fiber rug and dye it a rich jewel tone to mask the outdated pattern and make it more modern.
In a great twist of fate, I found a large (10 x 12) wool rug at the thrift store for only $15. It was filthy, but after four rounds of steam cleaning at home, the water finally ran clear and the rug was ready to dye.
I tackled the dyeing process when Melissa, my college roommate, spent the weekend with me. She’s the perfect person to rope into any DIY adventure.
The rugs I read about were small, so people were able to soak them in tubs of dye. My rug was way too big for any of that, so I laid the rug on a large tarp in my back yard. I mixed 8 boxes of teal RIT dye with hot water in a plastic laundry hamper, and then Melissa and I proceeded to pour the dye over the rug with watering cans.
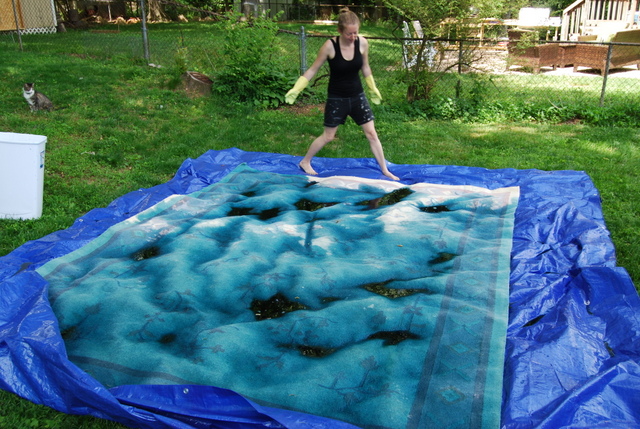
The dye pooled in different areas and wanted to run downhill to one end of the rug, even though the yard appeared flat.
The wool rug was so thick and densely woven that the dye wasn’t soaking all the way through, so eventually we started stomping the dye into it with our feet, like we were doing grape stomping. (Our toenails are still blue. . . )
We let the dye sit on the rug for an hour, and then rinsed it off with the hose as well as we could. Finally, we left it in the sun to dry before bringing it inside. 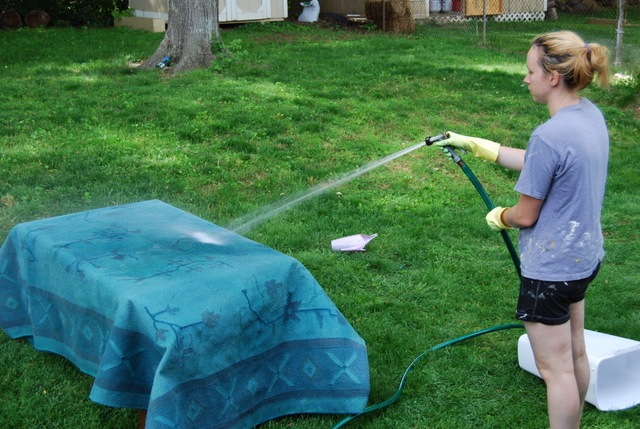
Fortunately Ryan and I have a dehumidifier in the basement, because I think the rug needed several days to dry completely.
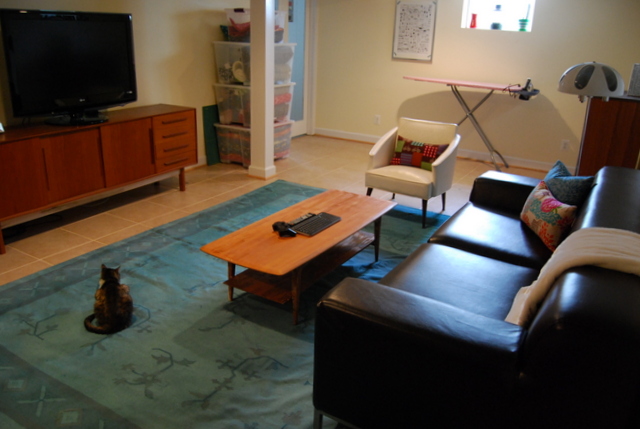
This past weekend Ryan and I rolled the rug into place, and even though the 80’s pattern was still evident, it looked much better than its original beige and pastel colors.
 The teal color was only 50% as dark as I wanted it to be, but I didn’t feel like repeating the process. The large rug is really cumbersome to deal with, even more so when it’s soaking wet.
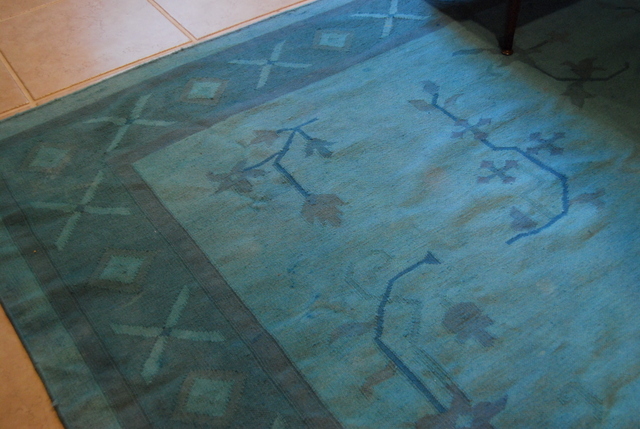
There are natural variations in the dye so that some areas are darker than others, and I don’t mind that so much. This one corner, which was on the downhill end, has the richer, darker teal that is closer to what I’d hoped for: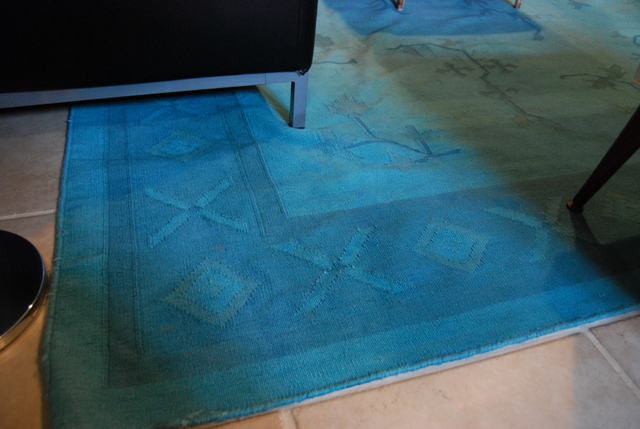 This corner is lighter and more dingy looking:
And this corner is the worst: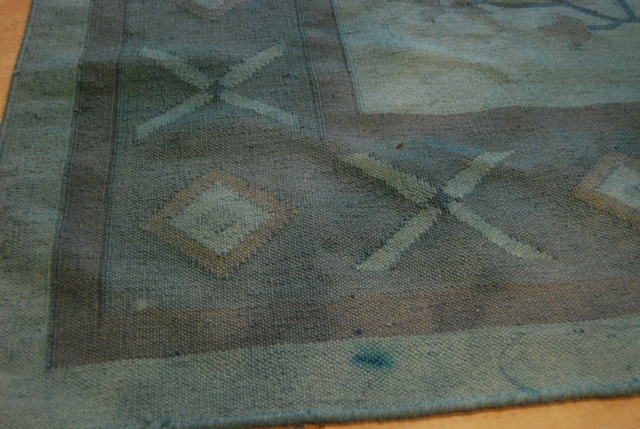
 So, what’s the verdict?
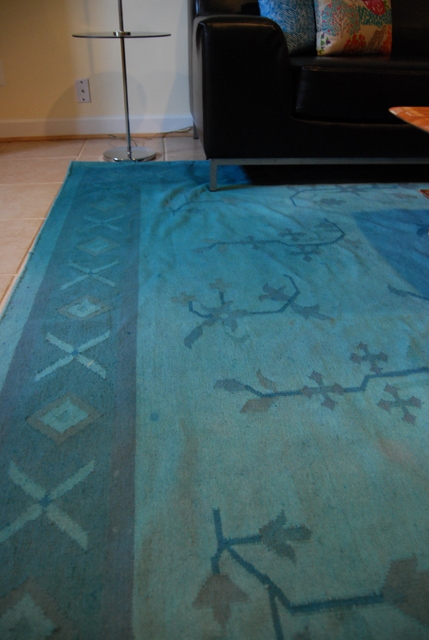
I could work with the variations. The worst corner could go under the sofa area, where it would be less obvious. And the basement looks much better with a big, colorful rug anchoring the seating area.
However, we’ve decided this isn’t a good rug for our basement. Here’s why:
- When we pulled up an area of the rug to move it, we found teal dust underneath it. This makes me think I didn’t rinse it out all the way.
- Our basement floods after days of heavy rain, and I worry that if the rug gets wet it may stain the tiles or grout teal.
- The whole reason we wanted a cheap rug was because my one cat occasionally pees on the basement rug, and again – if the dye comes out, that could be a big mess.
Pros:
- This is a cheap & easy way to update an ugly rug.
Cons:
- The larger the rug, the harder to dye it.
- It’s hard to rinse the rug thoroughly, so there’s a risk that moisture on the rug could cause stains.
- Large rugs don’t fit in the dryer, so you can’t really heat set the dye.
Overall, if you want to create an inexpensive, colorful rug, I think you’re better off painting a rug or trying one of the other DIY rug ideas. I don’t think dyeing a large rug like this is worth the risk of staining.


18 Comments
I. Love. This. This is so inspiring and I think it’s fabulous. I’m going to copy this. 🙂 I’m all pumped to go look for a thrifted rug now. I’m going to share this with my facebook group.
What will you do with it? I think it looks awesome. I”m sorry you were disappointed. It looks good anyway, though.
dylon rather than rit would make a big difference. Or another fiber reactive dye from Dharma trading company. Presoaking with soda ash would help too.
You could also hack the tarp into a large shallow pan and soakin the sun for longer.
If you wanted to retry it –
put boards under the tarp to prevent valleys. And use a level to make sure they’re straight – putting a stone or something to balance the boards would work – it doesn’t have to be a big construction thing.
Part of the dye coming out will be the problem of not having a flat surface to rinse it thoroughly. Although some dyes are just not resistant. Saving the underside of your rug from pooling dye underneath – just a few garbage bags laid out and fastened together to create a surface between the carpet and the floor would stop the dye leaking through. Which would be good for cat peeing but not necessarily for flooding. (I do something similiar for the cat pee in my house).
If you want to heat set the dye – does it have to be the dryer to do it? That is – would a heater or bbq work? Or is the moving air important?
That’s a good idea about leveling the tarp. After I posted Ryan said he thought the rug would fit in a really, really large rubber storage tub from the hardware store. However, I think maybe I just don’t feel like messing with it anymore. My friend who helped me dye it may be able to use it as-is in her new apartment, and she doesn’t have a peeing cat or leaking basement to worry about. I’ll know in a few weeks. I’m honestly not sure what is required to heat-set the dye. I suppose I should do more research but the progress thus far really wore me out!
PS: The garbage bag idea is a good one. Maybe since it’s so large I could use a clear plastic dropcloth sheet from the hardware store. thanks!!
[…] out there of bloggers who have tried this neat trend themselves. Jane from the Borrowed Abode dyed a wool rug turquoise to brighten up her basement. Robert at Design Lines Ltd. went bold with a bright yellow overdyed […]
The dye you used is a big part of the problem. It is a heat seat dye which means it is not permanent until it has heat applied got enough and long enough. And even then RIT has some issues with staying power. The website mentioned before, Dharma, would have what you need to get it done right. Funny thing is, you still managed to convince me to try it!
Jade – Thank you so much for the tips! Next time (and there will eventually be a next time) I will try the other kinds of dye. I love the potential for this project. Thanks – and good luck with your project! I would love to see how it turns out!
Great idea for my older 5 X 7 rug, thank you
I love this and I don’t mind the color variations….
However, it feels like more I want to take on with a room sized rug I am buying soon off the web…
So, I am going to try a truly cjeap, all natural dye for MY project… TEA
I will make a few batches f strong tea and tea dye the very worn places and edges of holes in the pretty persian rug I am getting . Next I will stencil a black crown here and there ) cause I am the queen in my room!) and some fleur de lis ( cause I love Paris) … and later look for fabric friendly gold leaf to glam it up… maybe a few Shakespeare quotes too for more drama!
I am glad I saw this as I feel dye is too much for my project, both in color and work, and tea is cheap, simple, natural and pretty!
I’ll let you know how it comes out…
But really your teal is pretty and I hope you found a good cat free space for it…
Hey, leave it out in a few good rain storms to get any more dye out — kidding! (not cool for the earth)
🙂
Robin
Robin – I love this idea! I would love to know how it turns out.
Why don’t you just paint out this whole rug if you have to use it, and make a painted floor cloth?
Hey Sandy, that’s a good idea. The reason we chose to give it a new home rather than paint is simply because I worried the cat would enjoy scratching at the paint too much, and it would wear out quickly.
Thank you so much for posting this idea! I love it and your photos really help too! I have three old rugs that got wet in the basement that need to be saved, and you have totally inspired me!
Hey Hollie! So happy to hear this – good luck with your project!
Your thorough explanation saved me a lot of time and grief. If there was ANY chance of it running/leaking, I didn’t wanna dye. Plus, sounds like a real p.i.t.a. I love the shape of the big round wool rug that came with our house, but half it is bleached by the sun. Guess I’ll start a “rug” jar (save up).
Nicole – yeah, it was a total PITA and I wouldn’t do it again. HOWEVER – there are some better quality dyes out there that should do a better job. But after trying to DIY different cheap rug ideas, I’ve determined that fabulous rugs are totally worth saving up for. If I had saved all the money I wasted on tiny rugs, DIY rugs, thrift store rugs I didn’t love years ago, I’d have way better rugs in my home now.