It’s high time I tackled another full-on rental friendly room makeover in my home. And I have just the room in mind . . .
During August I’m focusing on creating my sewing studio in the room formerly known as the guest room. This isn’t a spoiler alert, since I spilled the beans on that back in May. This is more of an official announcement and oath to tackle this project and complete it in a month. 🙂
While I’m not always great at following through with projects in the predicted timeline, I feel really confident that I can knock this out in August. Mainly because I’ve been thinking about it for – oh, about 6 months! I’m also inspired to finish so my shop is organized and efficient for the fall and holiday market / shipping season.
Here’s what projects are in store for the space:
Remove Tempaper- Paint Walls
- Move in existing cabinetry
- Create rental-friendly “faux built-ins”
- Organize supplies
- Create shipping station
- Hang a TV?
- Build a fabric (rolled bolt) storage rack
- Convert sewing table to dropleaf table to conserve space?
- Order a (larger) custom sized cutting mat
- Hang art
- Create wall rack to track orders
- Upholster chair
- Make sewing machine cover
- Make roller blind for window
- Add carpet / cushioning for feet?
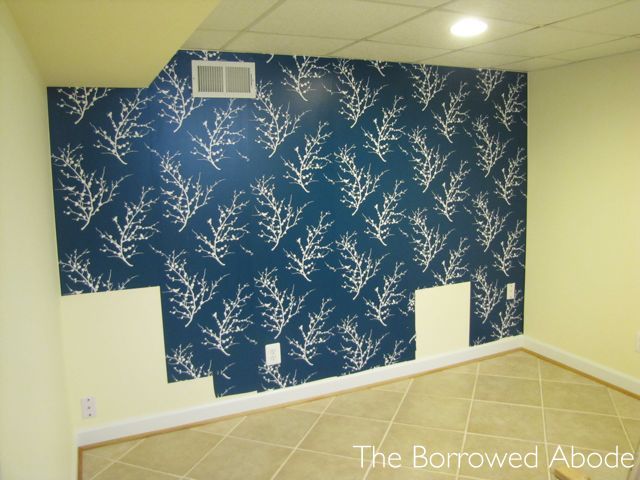
Once I got the bedroom furniture moved out, the first step was to remove the Tempaper (temporary wallpaper) that I had hung on one wall. I had a different design / aesthetic in mind for the space. Also, to make one roll cover the exposed area, I left areas covered by the beds blank. See below:
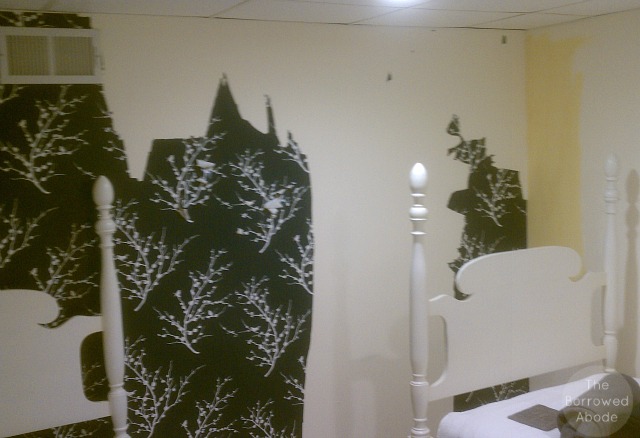
I started peeling off the Tempaper from the top corner. I was immediately surprised that it tore a lot as it peeled off. In other words, peeled off in small patches, not in the full sheets that I had adhered to the wall.

Pardon the crappy phone picture. I did this on a whim.
Though the process was annoying, once I had removed all of the paper and all the miniscule pieces that remained behind, the walls were as clean and freshly painted as the day I hung the Tempaper.
The fact that it came off cleanly with no damage to my walls is important. This means it’s really a safe option for renters. So, if you know you’re going to be somewhere for a year or more, Tempaper may be worth the splurge to make a fabulous accent wall in an otherwise boring rental-house room.
FYI: I have never been compensated for writing about Tempaper. This is my honest experience with the product.
With the furniture out and the wallpaper removed, the next step was painting the room. I had no idea what color to choose. Come back tomorrow to see what the solution was!


9 Comments
[…] the first step of creating my Janery sewing studio, I had a revelation related to painting (or not painting) the […]
[…] Studio Makeover, Part 1 […]
[…] Studio Makeover, Part 1 […]
[…] Studio Makeover, Part 1 […]
[…] Studio Makeover, Part 1 […]
[…] Studio Makeover, Part 1 […]
[…] Studio Makeover, Part 1: Removing Temporary Wallpaper […]
[…] Studio Makeover, Part 1: Removing Temporary Wallpaper […]
[…] Studio Makeover, Part 1: Removing Temporary Wallpaper […]