Here’s how I easily built a large sewing table to enable me to more efficiently create certain products for Janery. Hint: it’s not just a board on legs, but it’s almost that easy.
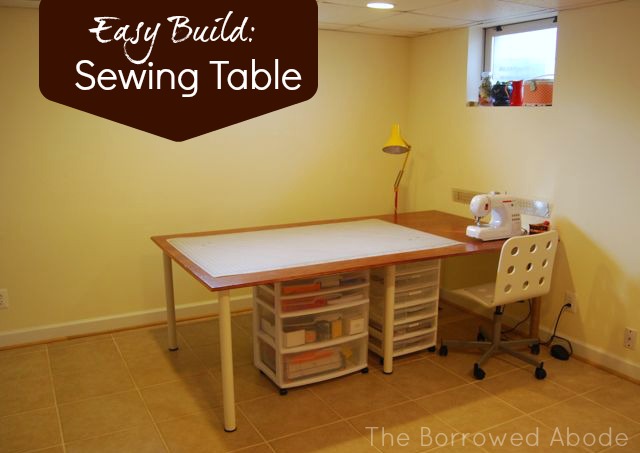
It all started last February, when I had a vision and raced to the store to execute it. . . . then never shared with you. This is what happens when I wait for something to be “perfect” before blogging about it.
Shame on me, because rarely is anything in my home ever perfect. And I bet the same goes for you.
Before we get into the details of how it’s made, let me assure you that you can make this in any size that you need. I’m not sure many people have a 7 ft x 4 ft dedicated sewing table in their homes. And for good reason – most regular sewing projects can be accomplished using a much smaller surface.
But dog beds, especially ones that measure 4 ft x 3 ft, require a much larger work space than a few throw pillows or zippered pouches. After my Merlin Mats started selling regularly, I quickly tired of hauling bolts of fabric into the guest room, then laying them down on a cutting mat on the floor to cut them.
Materials Used:
1 Sheet Maple Veneer Plywood (8 ft x 4 ft) – $40
Skinny pine trim moulding strips – $24
6 cheap Ikea desk legs – $21
Finishing nails – $3
How to Build The Massive Sewing Table
1. Cut Plywood to Size
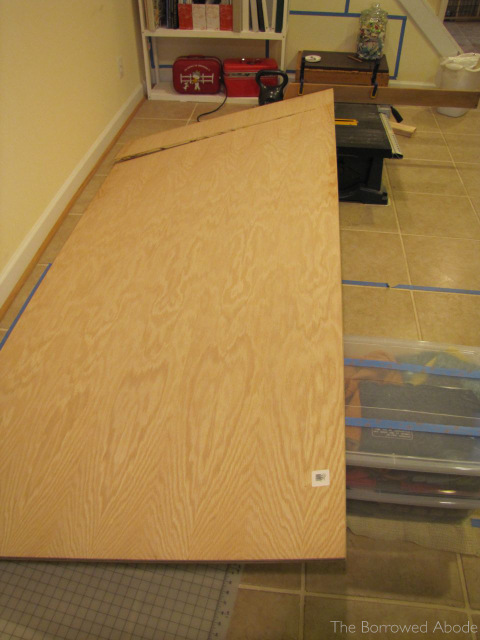
The hardest part of the project was getting the wood home, into the house, and cut to size. I’m saving that ridiculous story for another time, so let me say for now – it was a pain. I didn’t have it cut at the store because I didn’t know what size I wanted.
Lesson learned: Have the plywood cut at the store. Really.
2. Attach the Legs
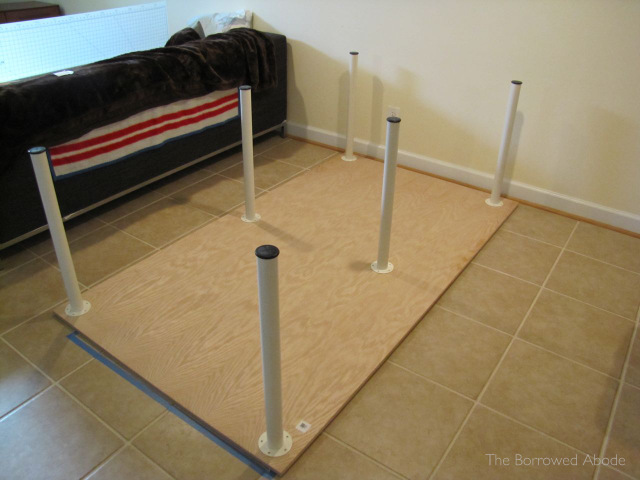
Once the board was cut down to 7′ x 4′, I took the simple Ikea legs off my smaller sewing desk and attached them to the board. I used 6 of them to ensure the board was properly supported in the middle.
3. Finish the Edges with Trim
Pretty wood trim, in the same width as the plywood, was just what I needed to finish off the ugly and rough plywood board edges. I’ve never installed trim on anything, but the method I chose seemed to work out well.
Ryan and I used the compound miter saw to cut the trim strips at an angle so that the ends of the trim would fit together to form perfect corners. If you don’t have a miter saw you could use a hand saw to cut them at an angle.
After holding the trim against the edges to make sure the corners aligned properly and all that, I then started attaching them. I’d add a thin line of glue to the edge of the table, then push the trim against it and secure that area with some painter’s tape. I moved down the length of the trim, repeating the process. Once the entire strip had been glued to the table edge and taped, I used finishing nails to secure it more.
blurry photo alert!
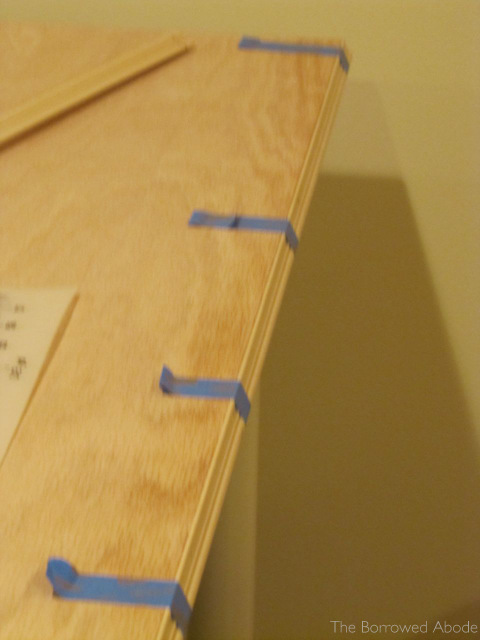
Finishing nails are super tiny, so I used pliers to hold them straight while I hammered them in. Then I hammered a big nail against the head of each finishing nail to countersink them.
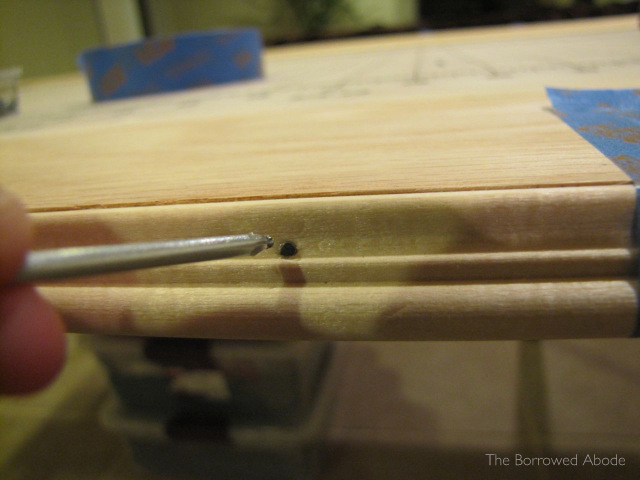
I left the painter’s tape on so the glued-and-nailed trim could dry for 24 hours.
4. Fill the Gaps (Putty)
24 hours later, it was time to fill the cracks and aim for perfection. I dabbed some wood putty into all the holes left by the countersunk finishing nails, and I also smeared some putty over the seams where the trim met the plywood, just for good measure. Finally, I smushed putty into the mitered corners where the pieces of wood trim met up.
I let the putty dry for 24 hours.
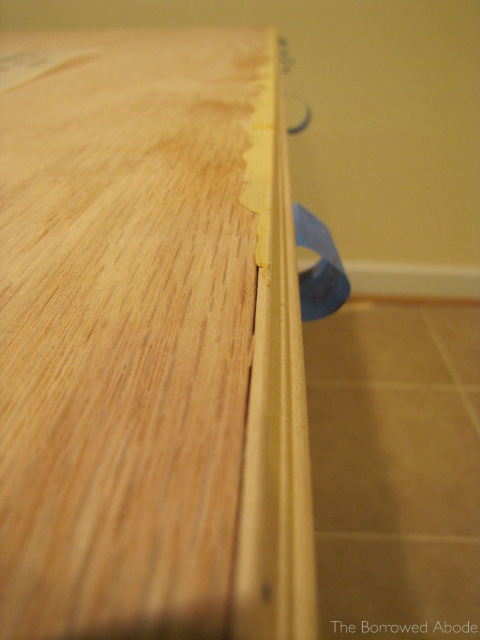
5. Sand, Stain, & Seal!
Finally, time to sand and stain the table! I used the electric sander to smooth down the table’s surface, then used hand sanding blocks to smooth over the trim wherever I’d added the putty.
I followed the same staining and sealing process I detailed in my mid-century modern sofa table tutorial, only this time I used a Dark Walnut Minwax Stain.
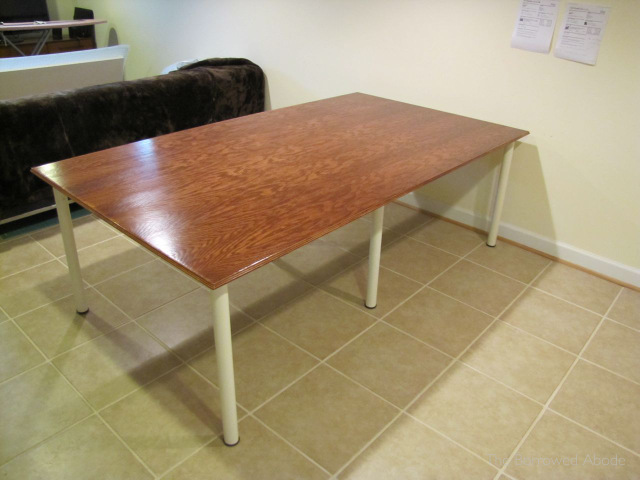
I am so happy with the resulting tabletop – the legs not so much, but they were free (already on hand) and easy. I’m going to find a way to make them nicer so the table looks more cohesive.
What I love the most is how the trimmed edges turned out.
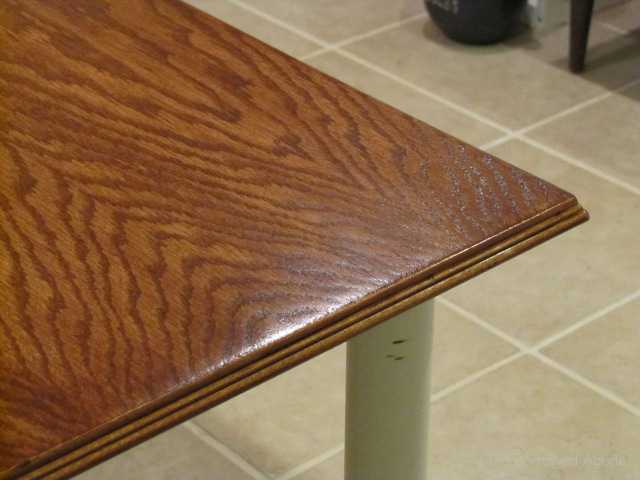
And if I ever get around to having a crafting/sewing party, I can seat up to 8 people around the table! That part is super exciting.
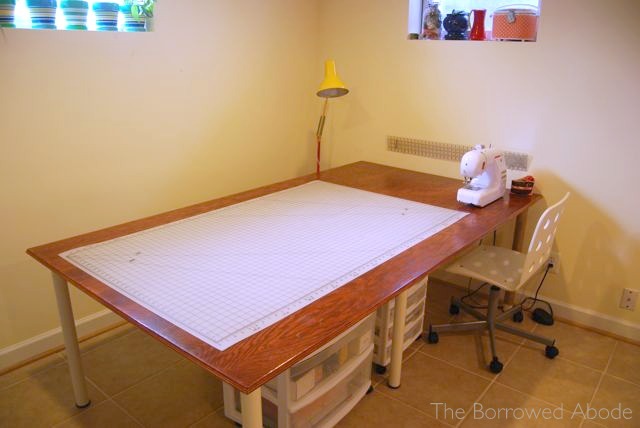
The table would have cost about $100 if I included the cost of stain and sealant, but because I already had that and the Ikea desk legs on hand, the only cost to me was $67. Still, even $100 would have been a pretty good deal for this large workspace.


20 Comments
Thanks so much for sharing this. I have been scheming for months now how to get rid of my much hated hand me down dining table and have been looking at the large sheets of wood at the hardware store and thinking about IKEA legs. You have me convinced I can do it. Now if I could just learn how to inexpensively make my own chairs! There are so many DIYer/creative types here in LA that it’s nearly impossible to find a crazy deal on chairs before some dealer has scooped them up and raised the prices by 2000 percent.
That looks great! I love the edge of the table – is it weird to find that trim pretty? haha
As a fellow sewer, I’m insanely jealous of how large the table is! Swoon!!
I’m hoping to get a sewing table for christmas, so my poor machine can stop living under my computer desk.
As a former architect/current artist, I am a big fan of “board on legs” tables. Or more specifically, “doors on legs” tables. Every office I’ve ever worked in has had this style of work surface (cheap and allows you to lay out a 30×42 set of architectural drawings) and my current studio has two such tables. I built them when I was an apartment dweller, and the process of getting two 3′-0″ x 6′-8″ SOLID CORE wood doors into my apartment (each weighing about 100 lbs) almost killed me. But that is a story for another time. I currently use a folding art market table for my sewing table though.
P.S. Commenting is much easier now! (And I’m amused by the tusked critter that showed up as my avatar!)
I love how your table looks, Jane. I also love this simpler format for commenting. Forgot to tell you that. 😉
[…] I showed you how I built my Massive Sewing Table, I left out a bit of the behind-the-scenes drama. Specifically, the part where I had to haul that […]
[…] What do large quantities look like? Well, decor-weight fabric comes on long 50″ bolts. They’re a bit unwieldy, and are almost as wide as my sewing table. […]
[…] corner of the room left in this makeover, and it poses the toughest challenge. I’m converting my 7 x 4 foot sewing table to a drop-leaf table. Wish me luck, and I’ll report back next week at the […]
Hello Jane
You are sooo smart! Love, love your idea and will want to copy it but i was wondering how sturdy is the table, does it shake when sewing fast? or is it very solid?
I am also interested in how sturdy this is, especially when sewing fast. Has it bowed at all since you first made it?
Hi Jenn! Thanks for asking.
First I’ll address the sewing fast part. I have a heavy Babylock Jane which is a seriously fast straight-stitch machine, and the table does not jiggle or more with the speed of the machine, even when I’m pushing thick foam through it.
The table has not bowed at all, and the middle legs helped prevent that. But after a while I did convert it to a drop-leaf table to make more room in my studio (when needed). Here’s the details / photos of that: http://theborrowedabode.com/2014/03/studio-update-part-14-converting-my-sewing-table-to-drop-leaf/
Overall, I am very happy with it. I hope this helps – if you have more questions let me know!
Hi Jane, thanks so much for responding so quickly! I have a HUGE room and am thinking about using the whole sheet of plywood. Keeping this in mind and based on your experience, do you think 6 legs would be adequate, or should I add a couple more to make sure I don’t get any sagging? Thanks!
Hey Jenn – 8 legs sounds like a good idea. Alternately, if you’re definitely not going to cut it in half later to make a drop leaf table, then I would recommend considering building a frame under it for support. Like I did here with my new desk: http://theborrowedabode.com/2015/07/6-foot-long-diy-hairpin-leg-desk/
It was fairly easy to build, though it did require a little more time and effort.
Perfect! You are brilliant Jane! Thank you so much! I just LOVE your blog. Our style is a little different, but our philosophy and approach are the same. I will send you a pic once I get it built, probably won’t be for a few months though cause I’m under a deadline for a large quilt. Take care.
Thanks so much! 🙂 I can’t wait to see what you make – it sounds really awesome. Cheers to large sewing tables 🙂 Happy quilting!
[…] months I’ve wanted to convert my handmade 7 x 4 foot sewing table into a drop-leaf table, simply because its massive size is sometimes more than I need in my 10 x 10 […]
[…] I built my 7′x4′ sewing table and then recently converted it to a drop-leaf table for more flexibility in this small room. Here […]
I finished the table a few weeks ago but have been finishing up some quilts! Having my first quilting class next Sunday – we will fit 4 machines and have 2 cutting areas on this table. Also just purchased a Gammill long arm today. Lots going on in my quilting studio. Where can I send you a pic? I made a few modifications 🙂
[…] FULL PLAN […]
Nice and so easy! I’m making mine with folding legs so I can store it. Love the finished edge!