So you really want to read the step-by-step saga that was our nightstand-building project? Wow. You must be really bored at work.
I thought we’d have these nightstand built in just one weekend, but two months later – I can tell you it didn’t quite work out that way.
I’m going to cram all 2 months of trials and tribulations of a first-time furniture builder into a numbered list. For the real construction plan, visit Ana at Knock-Off Wood. But read this first, ’cause once you visit Ana you’ll get lost in her fabulousness.
- One fateful day in late June, armed with our instructions and cut list from Knock-Off Wood, Ryan and I went to Home Depot.
- We had high-quality birch veneer plywood cut to our specs . . . supposedly.
- The next day we took the wood 45 minutes south to our awesome friend Kevin, who used his table saw and impeccable skills to fix the incorrect and uneven cuts made at Home Depot. We decided we should eventually acquire our own damn tools.
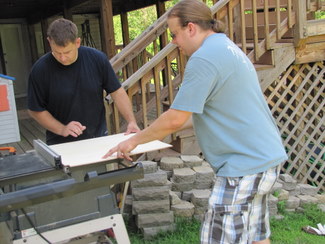
- Back at home we assembled the shells of the nightstands and discovered that we hadn’t fixed all the board sizes at Kevin’s house. The tops and bottoms were longer than the sides, so they stuck out.
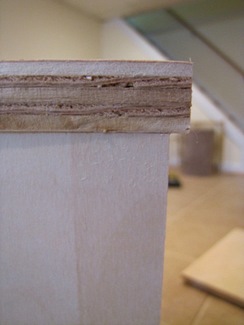
- We stood back to admire our work anyway.

- I got a pedicure. (Ladies, this is a crucial step.)
- During a visit to my parents in Delaware, I took the wooden frames with me, so that I could use my dad’s fancy saw to trim the mis-measured overhang.
- I attached the backs and the feet.
- I used this awesome iron-on wood veneer to cover all the raw plywood edges on the front and sides.
- The following weekend I applied several coats of the darkest Minwax wood stain, espresso. I wondered, a bit too late, if there was low-VOC stain available.
- Three coats and thousands of dead brain cells later, I was horrified at the uneven results. You call this espresso??

- I was also horrified that the wood-filler (used wherever the countersunk screws were placed) was super obvious.
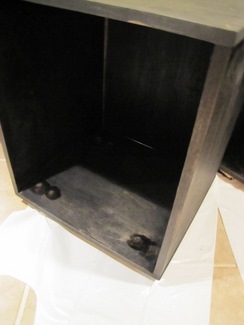
- I wailed to Ryan that it was “a disaster.”
- We decided paint was the only option for these ugly ducklings.
- For the next few days (weeks?) I agonized: Spray paint or latex paint? Brush or roller? I asked you guys for opinions. I talked to the pros: my dad, who kicks ass with furniture refinishing, and my ex-boss, whose son built me this furniture.
- I decided to go with spray paint, even though I’d never liked using it in the past.
- One a very hot Sunday in July I prepared to make a spray paint mess. I channeled my inner Dexter and draped the entire back porch in plastic to make clearing the evidence a breeze. I wondered what the neighbors would think.
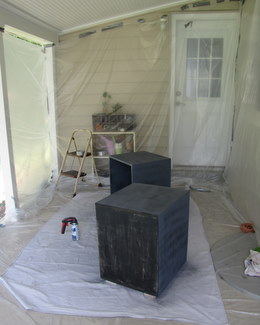
- Using a handy little spray paint gun attachment, I applied three coats of primer and three coats of dark brown spray paint. I sprayed evenly, slowly, and carefully, keeping my 12″ distance to minimize drips.
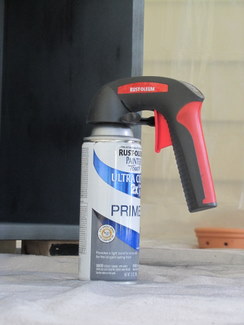
- The results? A rough-feeling, milky coffee color.
- I wailed to Ryan [again] “This is a disaster!”‘
- I blew my nose that night. My boogers were dark brown. I made a mental note to never spray-paint again.
- I decided I had nothing left to lose, so why not apply latex paint over the spray paint that was over the stain?
- Determined to avoid more disappointment, I purchased two samples of different dark brown Behr paints.
- I spray painted a board, then applied a different paint to each end of the board. I chose the darker of the two, French Roast. (It’s on the right.)

- I donned my fugly painting clothes and sanded the damn nightstands with 600 grit sandpaper.
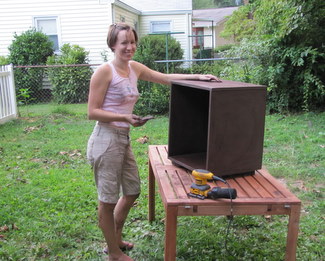
- That night my boogers were brown again.
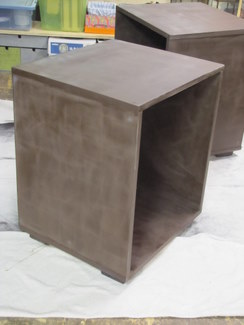
- Editorial note: At this point the “damn nightstands” (as they’d come to be called) were the bane of my existence. I actually caught myself, several times, wishing I’d just bought some. The ones at West Elm that inspired my creation were on sale. Oh, the frustration. But stubborn as I am, I persevered.
- I painted the nightstands with the highest-quality 1/4 nap roller I could find, because that’s what the paint guy said to use. It was dandy.
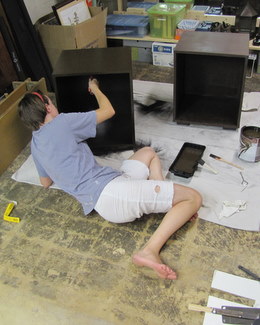
- When Behr’s French Roast dried, I was [yet again] disappointed in the result. (Are you sensing a theme here? )
- In a last-ditch effort to get the luscious espresso color I dreamt of, I did one application of the espresso wood stain over top of the regular paint coat.

- It worked, giving the paint more depth and richness. Awesome.
- I sanded things down with 600 grit sandpaper, again. The sandpaper made scratch marks in the paint, so I stopped.
- Over the course of several days, I applied thin coats of semi-gloss Minwax Oil-based Polyurethane to seal and protect the paint job(s).
- I had the shelves cut at Home Depot.
- Finding that the shelves were – SURPRISE – cut wrong, I returned to Home Depot and had them re-cut. I painted and poly-ed said shelves.
- After measuring uber-carefully, I drilled holes to insert little shelf holders.
- I inserted my shelves.
- Ryan carried the nightstands to the bedroom where I proceeded to admire my work and take photos for the blog.
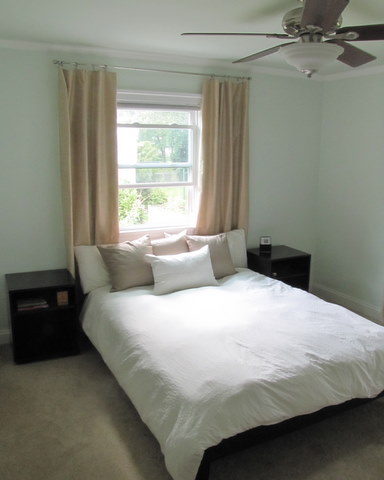
So . . . 38 steps later, I have nightstands. It would have been much simpler to do what Dave and Kelly at My DIY Home did!
Here’s what I’ll do differently next time:
- Use solid hardwood boards (available at Home Depot for the same cost as veneered plywood)
- Mark my own cuts on the wood before asking the Home Depot guys to cut them
- Measure the cut boards before leaving Home Depot
- Test different stain colors on a small piece of wood before applying them to furniture
- Not use spray paint
All I can say is, I pity whichever of my future grandchildren try to refinish them. I don’t think there’s enough paint stripper in the world to get down to the bare wood ever again.
What did it cost? I’ve lost track. Probably over $200, but that’s partly due to user error, multiple paint and stain purchases, and the fact that I picked up an electric sander.
I don’t think I can beat this dead horse any more, so the topic of the “damn nightstands” is officially retired.



15 Comments
I hope you don’t mind if I’m just chortling away over here…
At least they worked out in the end! I have felt your pain before…and I’ll soon be posting a ‘DIY Duds’ post covering the concrete and wood (but mostly concrete…which is a bit more difficult to repurpose) misadventures 🙂
I had to laugh at the “brown boogers” commentary. I have been spray painting my patio furniture (off and on) since about June. Everytime I go at it, I end up with lime green boogers for days! I finally decided (was bullied into by fiance) to wear one of those Dr. face mask thingies, and somehow the damn paint made it in or around or under or through and I STILL had lime green paint in my schnoz. Grr.
Ha! I’m glad I’m not the only one. I hope that us DIYers don’t all end up with nose cancer later in life!
You all are friggin’ rock stars. I would have given up…I get so frustrated! $200 still sounds like you saved a lot of money. Plus, you have a funny story to go with. No one who just goes to West Elm to pick up a pair of night stands can possibly have a funny story!
Hehehe! You did go through a lot to get the look…way to stick it out though:)
I love that now you will have these nightstands FOREVER. As in, you and Ryan will be telling the grandkids stories about these nightstands.Your children will roll their eyes at the number of times they’ve heard you talk about them. 🙂
You’re as stubborn as I am, Jane! LOL! I’m sorry the spray painting didn’t work out for you! I think they look FANTASTIC!!! NICE JOB!!!
Yeah, but they’re pretty damn fabulous. Oh, and Ryan is Hilarious. I thoroughly enjoyed his commentary on the blogger lexicon.
Such a great story, way to stick with it to the end! They look amazing!
xoxo,
Jen
[…] New reader? Read more about the lamps, the handmade storage boxes, and the nightstands we built. […]
[…] with fabric? Why do I scour thrift stores and flea markets for used goods? Why do I long to build furniture out of wood reclaimed from trashed shipping […]
[…] summer my fiance and I tackled our first furniture-building project: bedroom nightstands. And because we wanted to keep things simple on our first foray into furniture craftsmanship, we […]
[…] those modern wooden nightstands that Ryan and I built 1.5 years ago? Well, they’ve been gone since October, when I sold them in a yard […]
[…] holes in the walls. That’s why I waited to install my lamps until I had completed the saga building of the nightstands. Once the nightstands were in place, however, it was much easier to determine the ideal […]