Years ago I got this pre-loved set of three nesting tables for $15. I snagged them because I needed something to keep my patio chairs company outside my old condo.
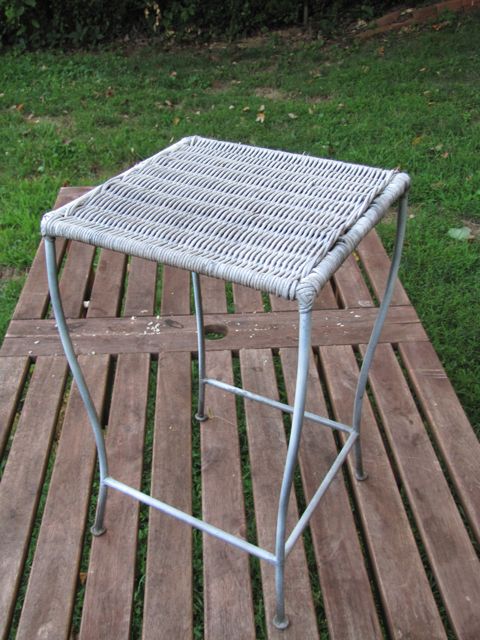
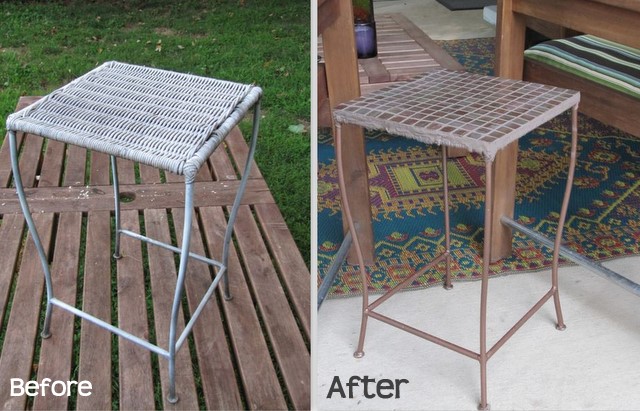
The wicker was old and grimy, and the metal was blah. Early on on my blogging days, inspired by the supposed magical powers of white spray paint, I tried spray painting it white. It had less than stellar results, and only proceeded to look worse as the weather worked at it.
The biggest problem (which isn’t evident in this photo) is that the wicker top was warping, creating a horribly uneven surface for glasses.
When I found out my blogging buddy Mikalah was coming to visit, I decided to fix the table once and for all.
I set off for Home Depot without a plan. I looked at the simple large ceramic tiles, thinking that it would be easy to adhere a big square tile to cover the table. But the ones that were the right size were so dull.
Then I spied the copper-toned tiny glass tile sheets that I’ve been in love with – for like ever.
With my wicker tables in such rough shape, I decided I had nothing to lose if I gave it a try.
Supplies that I bought:
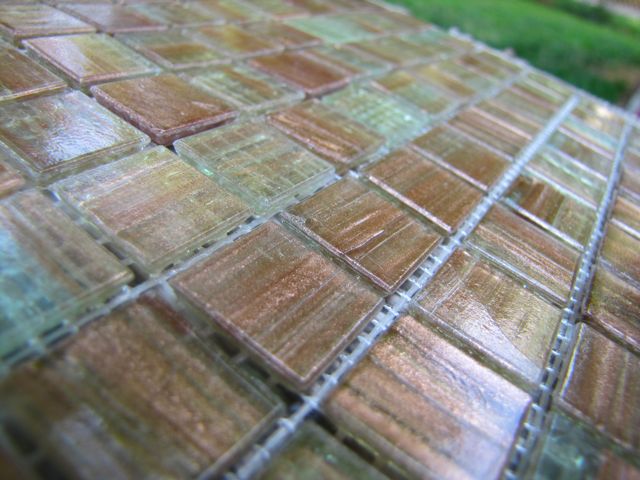
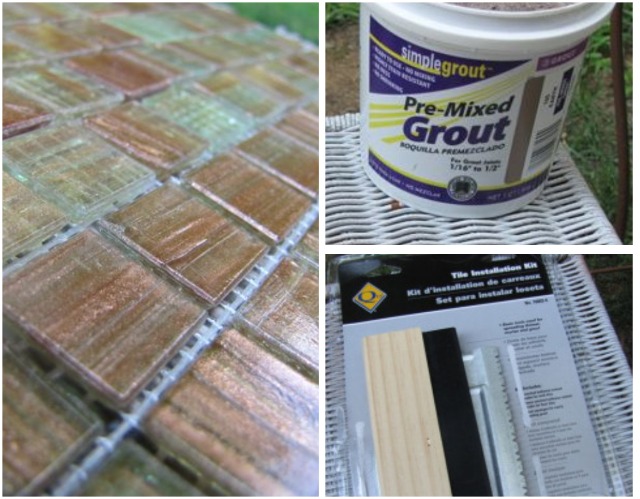
- Tiles: each tile is about 1″ square, but is adhered to a type of mesh backing so that you can lay a huge block of tiles all at once.
- Grout: The pre-mixed grout came in different colors. I chose the color that was the closest to the copper tones of the tiles. Also, the pre-mixed stuff cost more, but seemed worth it rather than having to mix up a batch myself.
- Tile Installation Kit: This contained little tools for spreading the grout. It was cheap, so I gave it a shot.
- Copper-colored Spray Paint
I went ahead and tackled the project, trying to figure it out as I went along.
First, I spray painted the legs of all three tables. I forgot to take a photo. But trust me, even the simple coat of copper paint made a HUGE difference!
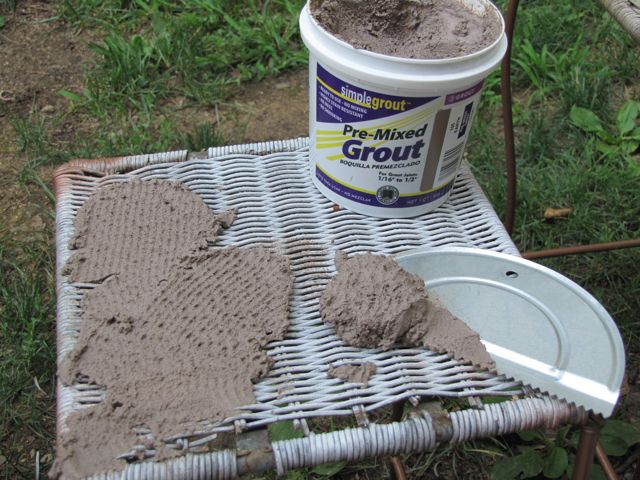
First, I spread a thick layer of grout over the wicker surface. The idea was to make the grout thick enough that I could then even it off and create a level surface on which to adhere the tile. (Rather than the super uneven wicker below it).
After the grout was on, I dragged the metal half-moon spreader thingy over the surface to get it nice and level.
At this point I may or may not have been thinking “Jane, what on earth are you doing?? Why did you think you could tile tables?”
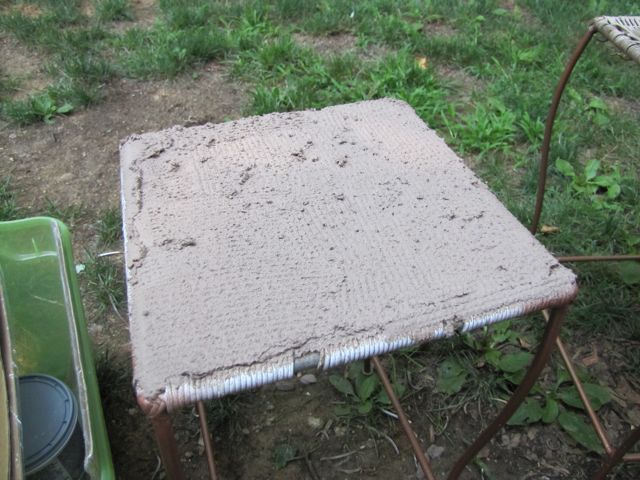 **FYI: This is not the proper way to lay tiles. From what little research I did, you’re supposed to use a different material, a tile adhesive, underneath tiles. But I wanted to keep things simple, and buy fewer products, AND I was hoping the grout would be beefy enough to serve as a kind of level concrete surface under the tiles.
But I persevered.
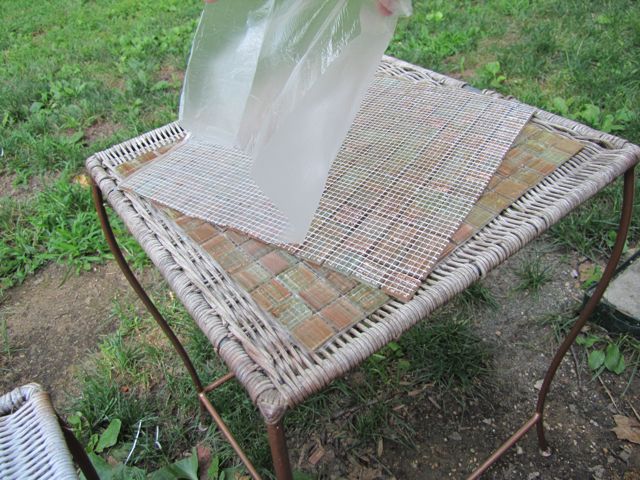
Time to lay the tile! I peeled the plastic backing off the sheet of tiles. See that mesh in the photo below? That holds the tiles together.
Side note: Have you ever tried to take photos while simultaneous using grout and installing tile? It’s tough to do without grouting up the buttons on the camera!
I [put down my camera and] carefully set the tile sheet over the grout.
Next up, applying grout: This is where things got tricky.
Normally you’d lay the tiles over adhesive on a flat, hard surface, so squishing grout into every nook and cranny would be easy. But because I was laying tiles over wet grout on a wicker surface, sometimes when I squished the grout into the cracks the tiles squished down, too. In some places the bottom layer of grout was oozing out between the spaces in the wicker.
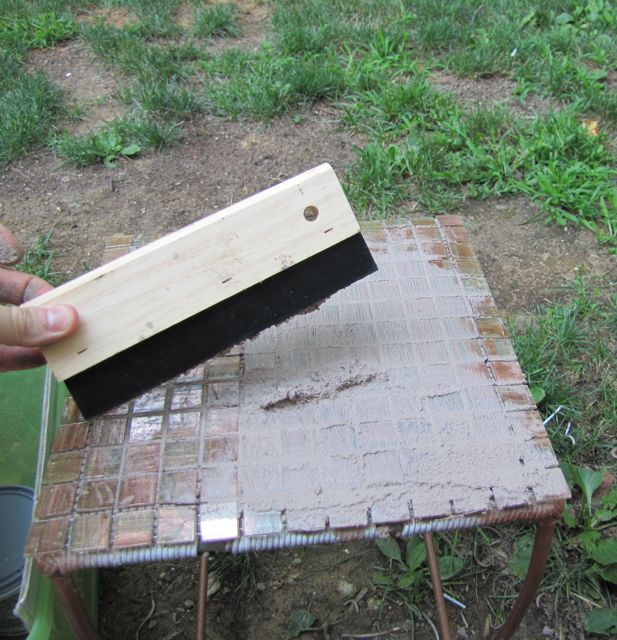
So I don’t really know how to describe my process, other than to say that I carefully applied the top layer of grout. The grout spreading tool (pictured below) was really useful.
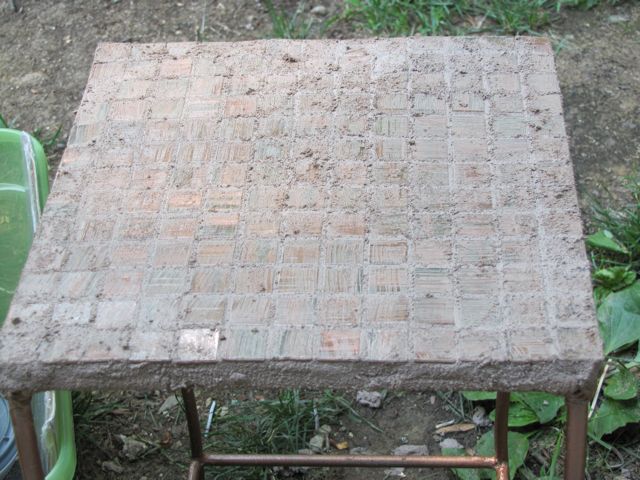
Below you’ll see the completely grouted tile top.
The edges were the hardest part, because the grout wanted to fall out from under the tiles, so I kind of held one hand against the side to keep the underneath grout in place while squishing the top grout into the tiles.
In some instances I lifted up the edge of the tiles and added a little more grout underneath so that I could keep as smooth and level a tile surface as possible.
It was a very learn-as-you-go DIY process.
Once I had the tile grouted as evenly as possible, it was time to clean it up. To do so, you simply wipe down the surface with damp rags.
Once again, because the surface underneath the tile was still soft and pliable, this was a tricky task.
Once I had the tile cleaned off as well as possible, I left the table alone to harden for about 24 hours.
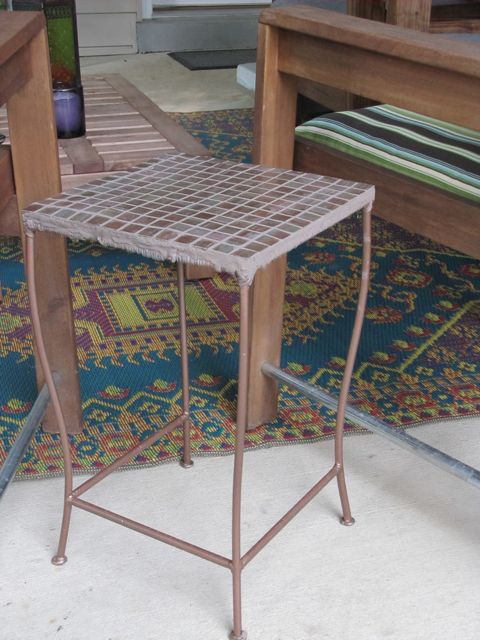
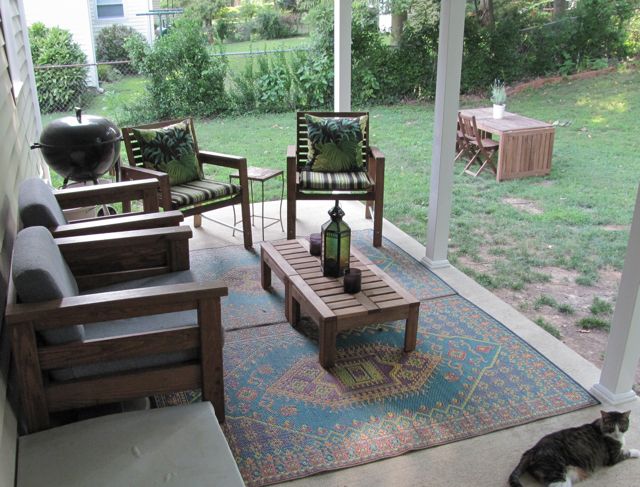
The next day, I moved it into place on my newly dressed up back porch, between my tropical wooden chairs. It was SUCH an improvement over the sad wicker table!
It was only a coincidence that the copper tones of the table coordinated well with the apparently coppery colored wood of the furniture.
The tile top still isn’t perfectly flat and level, but it’s a huge improvement over the old wicker surface. It’s been tested with water glasses, wine glasses, and even martini glasses – with great success.
I still need to dress up the grout edges. I’m thinking I’ll cover the tiles, then sand the edges to make them smoother, and then paint the edges with the same copper spray paint that I used on the metal legs.
As for the remaining two tables – I’ve learned a few lessons on how to tile them. Here’s what I’ll do differently:
- I’ll cut a thin piece of plywood as the base between the tile and the wicker, so that I get a truly firm and level surface. I’ll use Goop and maybe a staple gun to adhere the plywood base to the wicker.
- Then I can use a thin layer of tile adhesive under the tiles instead of the awkward grout.
I can’t wait to see if that makes the process easier. And when I’m done, I’ll have a set of three nesting, tiled tables. I feel as though this could be the start of a tile addiction. I’m envisioning a matching tray lined with glass tiles to top off my outdoor coffee table.
Have you done anything creative with tiles?
And do you have any tips on what sealant I can use to protect the tiles and grout from the weather?
I’m sharing this at the August Thrifty Treasures party at Southern Hospitality.





23 Comments
The table top looks really great! Fantastic idea! I believe you that the sides look a bit awkward in person but in these photos it looks kinda awesome. 🙂
Also really liking your updated blog design.
ahhh genius!
as my fav poptart would say, its “AB FAB!”
I think the plywood is a great idea. At the top of this post I definitely thought “but it’ll be all squishy when you push it down!” Great work reworking what you have 🙂
Drat! Where were you when I started the project? 🙂
What a smart idea! I have a little table with a tile top…that I bought.
This is gorgeous Jane! I love it! 🙂
Totally love!
It turned out so pretty! I love it…great job!
I love this! I have always wanted to work with tile, but I am too scared. I have always wanted to make a mosaic and frame out either a mirror or a picture frame. Maybe I can get you to work on one with me…after we work on my thrift store find 😉 Jane, I am so excited to find someone who likes to do these things!
I love this! I have always wanted to work with tile, but I am too scared. I have always wanted to make a mosaic and frame out either a mirror or a picture frame. Maybe I can get you to work on one with me…after we work on my thrift store find 😉 Jane, I am so excited to find someone who likes to do these things!
I love this! I have always wanted to work with tile, but I am too scared. I have always wanted to make a mosaic and frame out either a mirror or a picture frame. Maybe I can get you to work on one with me…after we work on my thrift store find 😉 Jane, I am so excited to find someone who likes to do these things!
I love this! I have always wanted to work with tile, but I am too scared. I have always wanted to make a mosaic and frame out either a mirror or a picture frame. Maybe I can get you to work on one with me…after we work on my thrift store find 😉 Jane, I am so excited to find someone who likes to do these things!
I love this! I have always wanted to work with tile, but I am too scared. I have always wanted to make a mosaic and frame out either a mirror or a picture frame. Maybe I can get you to work on one with me…after we work on my thrift store find 😉 Jane, I am so excited to find someone who likes to do these things!
What an awesome makeover! I have seen those exact same tiles at the home improvement store and always wanted to find a use for them. I totally saw this when we were there, it looked amazing! I was drooling over your gorgeous porch as well. Someday I want to have a space like that!
As the wife of a former ceramic tile installer, I had to LOL at your tile laying methods. That’s probably how I would do it too in my impatience to git ‘er done! 🙂 But next time wait for the adhesive to dry before you grout the tile, and you won’t have problems with it squishing out and the tiles not staying level. Even using thin wood as a backer, your tiles are going to squish and get uneven if you try to grout it before the adhesive dries.
You won’t need to seal the tiles themselves if they are solid glass, but you can seal the grout to protect it from staining and mildew. Check the types of sealers they have at your home improvement store. You want one that is mildew resistant.
The table looks great BTW!! 🙂
Jodi –
Thanks for all the good info! I will definitely heed your advice when I do the other two tables. And I’ll get some sealer for that grout.
Thank you!!
-Jane
It looks great! Love the repurposing. I do have a silly question though: if you are using the plywood on the next tables, wouldn’t it be easier to remove the wicker and use some U brackets to attach the plywood to the metal frames on the top? I feel like it wouldn’t be to hard to remove the wicker by cutting around the edges, but I don’t know if you’re keeping the wicker for structural reasons.
I bought a side table at my church garage sale a couple of months ago. I was going to sand and stain but I was watching a Nate Burkus show and he mentioned tiling a table top. I love your pictures and I am going to go looking for tile very soon. Your table looks great and I hope mine will come out just as well.
Hi Dawn! Thanks so much – I hope your table turns out well!! I’d love to see a photo when you’re done!
[…] DIY Mosaic table makevoer […]
Thank you for posting about this! I am hoping to make a tiled garden table and found a wicker base and was thinking of getting a piece of plywood for the top. After reading your gout experience I’m thinking I’ll go with a gooey adhesive for the tile. Your table looks great by the way! I can’t wait to see the others!
Hey Amber! I actually just pulled my other tables back out to finish up in the next month or so 🙂 I’m going to do a plywood base first to add stability – and I have read great things about that tile adhesive. I wonder if it’s weather-friendly for the outdoors? I’ll have to look into that. Thanks for the idea!
[…] DIY Tile Topped Table […]