Would you like to know how I built my mid-century modern style hall table from scratch, using no screws? You’ve come to the right place.
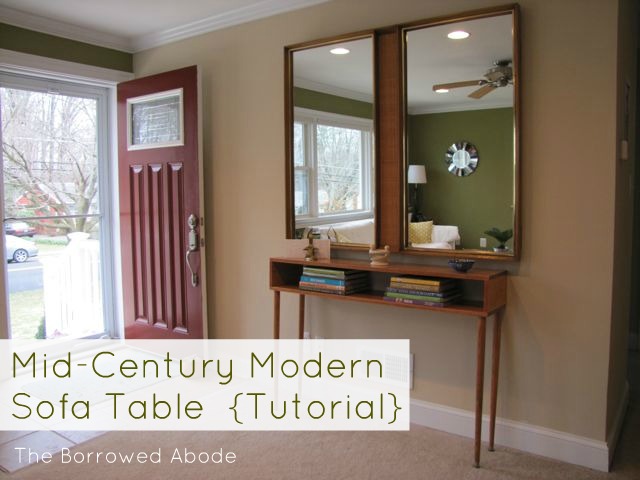
I’m so sorry I took 6 months to write the tutorial. That whole getting married business really distracted me from blog posts 🙂
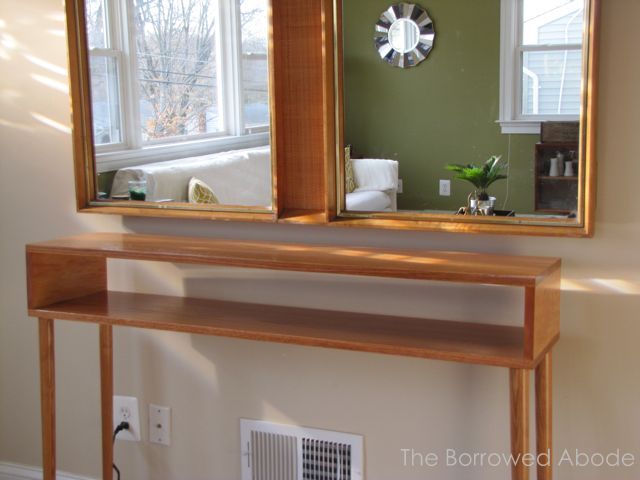
For over a year Ryan and I wanted a tapered-leg wood table to fit under our vintage mirror in the “entryway” of our ranch house -but all the mid-century tables we found were way too expensive. The solution? Build a custom sized one from scratch!
Dilemma: I knew I didn’t want to have metal screws showing on the outside of the box; I wanted a smooth, seamless, screw-free finish.
The Kreg Jig offers a way to join boards when building by creating pocket hole jigs hidden on the inside sides of the furniture. However, you have to buy the $100 jig kit as well as the special screws that go with it. That’s why I was especially excited to discover this Doweling Jig Kit at the local hardware store. For only $30. Sure, I’ll have to buy more wooden dowels in the future – but they’re much cheaper than the special Kreg-brand screws.
And if you join boards with both wooden dowels and wood glue, you create an incredibly strong bond (mainly because of the glue) and you really don’t need screws!
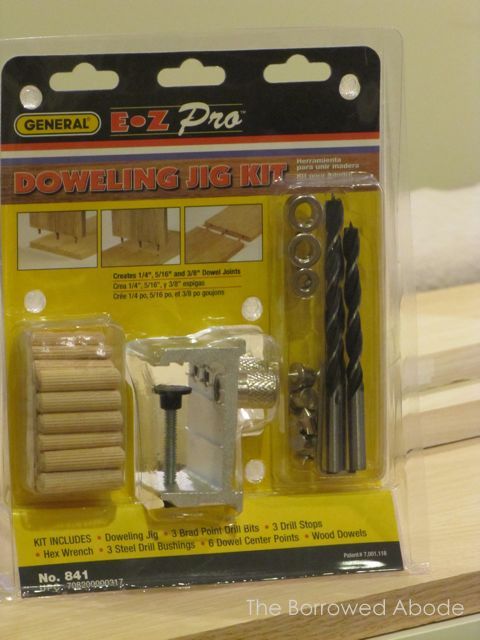
Sourcing Supplies:
Lowe’s had gorgeous Red Oak boards, and they just happened to come in 4-foot lengths. Perfect – because the mirror is also 4 feet wide.
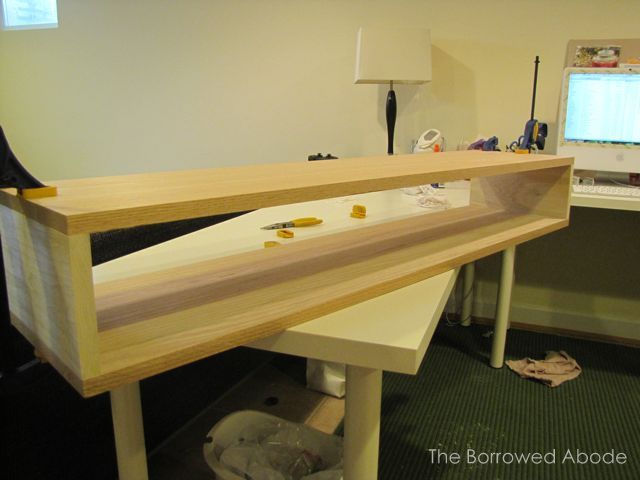
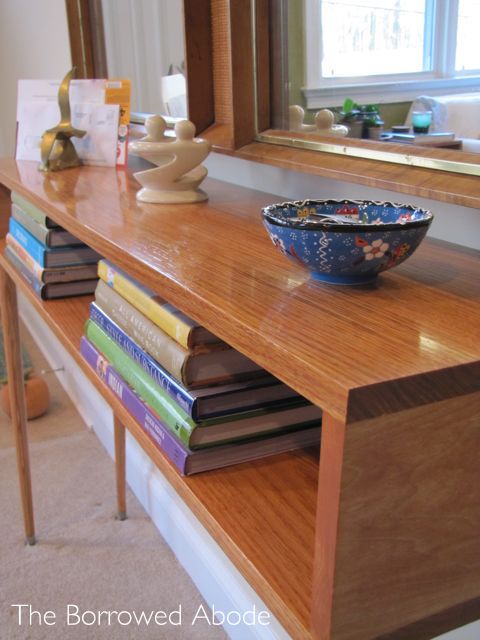
I knew that the design I was going for would require a slender rectangular “box” of wood for the top of the table – like what you see in the photo above. I didn’t have strong feelings about box size, so when I found a 6″ wide boards, I decided that the box could be 6″ tall. I think that size worked out perfectly.
The round wooden legs – a very mid-century modern style – were also at Lowe’s, but you can also find them online via Amazon.com in several sizes.
This project broke down into three main tasks: Building the box, attaching the legs, and finishing (staining and sealing).
Note: From here on out I will refer to the top of the table – aka the non-legs part – as the “box”.
How To Build the Box:
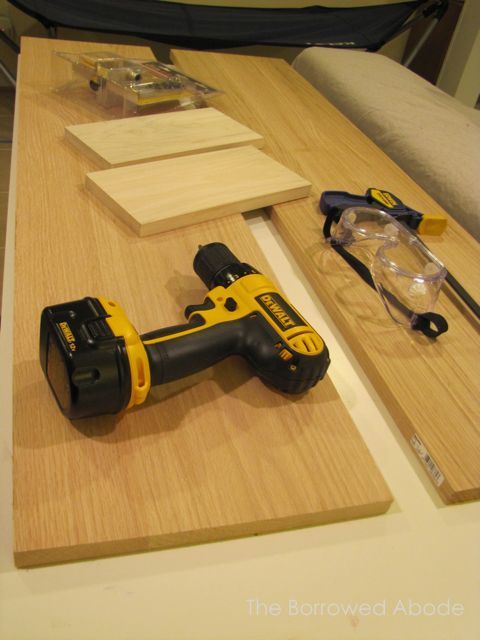
I set out all my supplies:
- 2 red oak boards (4 ft long / 12″ wide / 3/4″ tall)
- 2 poplar side boards (12″ long / 6″ wide / 3/4″ tall)
- Drill
- SAFETY GOGGLES
- Doweling jig kit
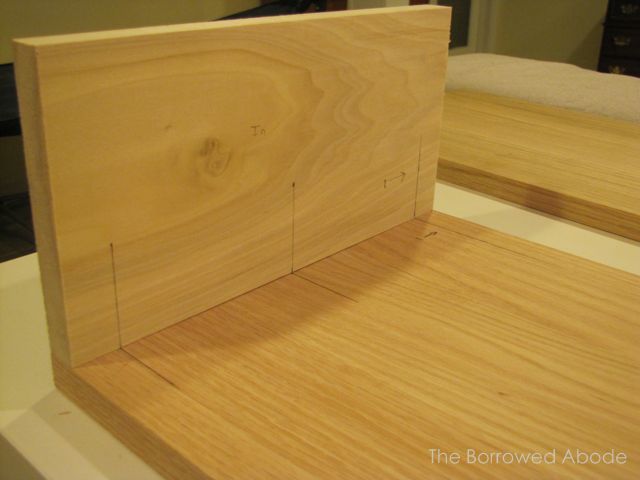
1. I held each side board against the top and bottom boards and labeled them, so that I’d know which sides of the boards were supposed to attach to each other.
For example: I marked a “1” on each of these boards (see below) near the seam where they joined. That way when I was assembling them, I knew to put the sides marked “1” together.
2. I measured and marked lines where the dowel holes would go. I chose to do three doweled joints for each seam.
3. The Doweling Jig Kit came with dowels, dowel drill bits, and dowel drilling guides – all in 3 different sizes. I chose the largest size because the red oak boards were very heavy.
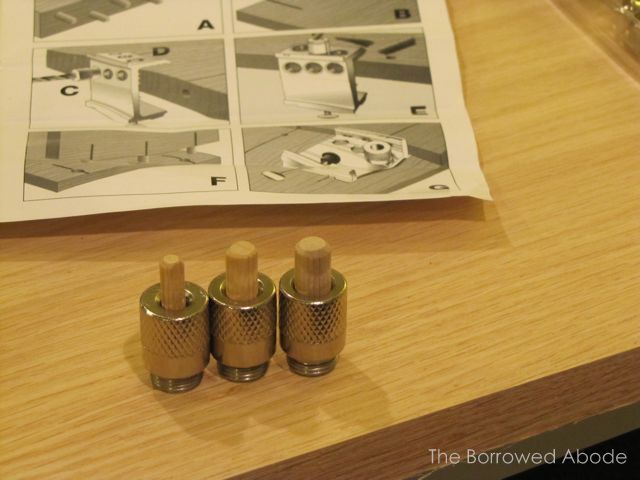
4. I used my Doweling Jig Kit to drill three holes in the top and bottom of each side board.
Note: Pay close attention to the instructions that come with the Doweling Jig Kit. When you are drilling the side boards you have to make sure your jig is lined up with the OUTSIDE side of the board, not the inside side. Otherwise you won’t get a flush external fit.
Just read the directions. 🙂
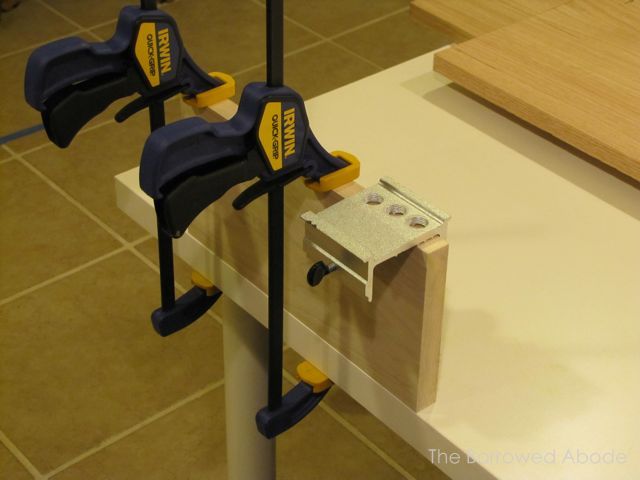
5. Next, I used the Jig to drill three holes at the ends of the top and bottom boards.
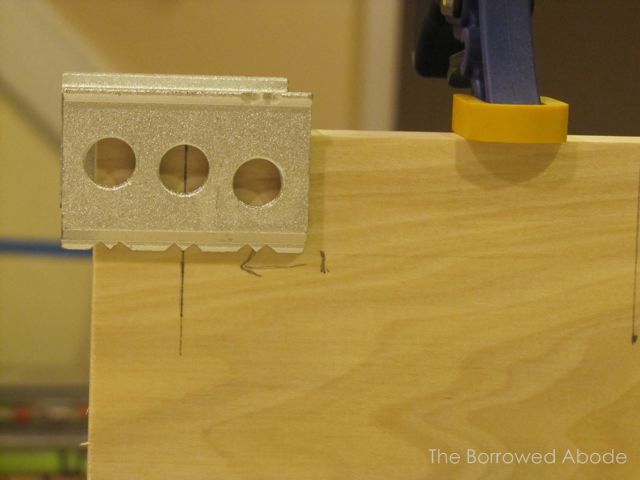
6. Next I tapped the corresponding dowels into the holes I’d created, then fit the box together to make sure it worked. A few of the dowel holes weren’t deep enough for the dowels to go in all the way, which meant that the sides did not come together flush, so I had to tweak them by drilling just a bit more in the holes.
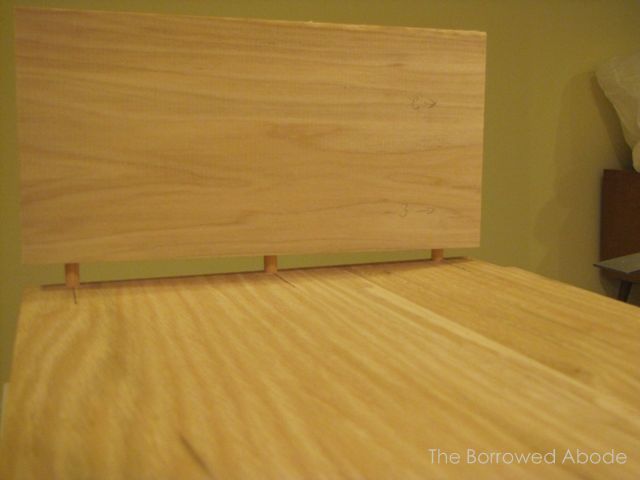
7. Once I was sure my box was fitting together perfectly, I took it apart one last time, added a thin line of glue to the sides (as well as in the dowel holes) and re-assembled it a final time.
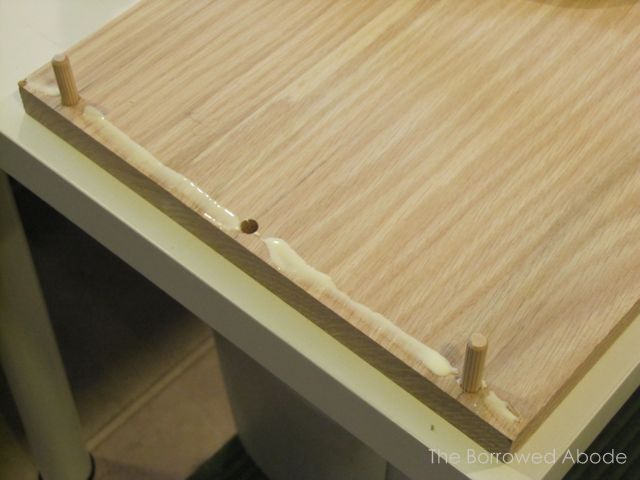
8. I set the box on my table and clamped all the seams to ensure a smooth, tight seal.
If there was excess glue seeping out of the seams, I wiped it off quickly with a damp rag. Glue does not take stain, so it’s important to get it all off of the outside surfaces ASAP.
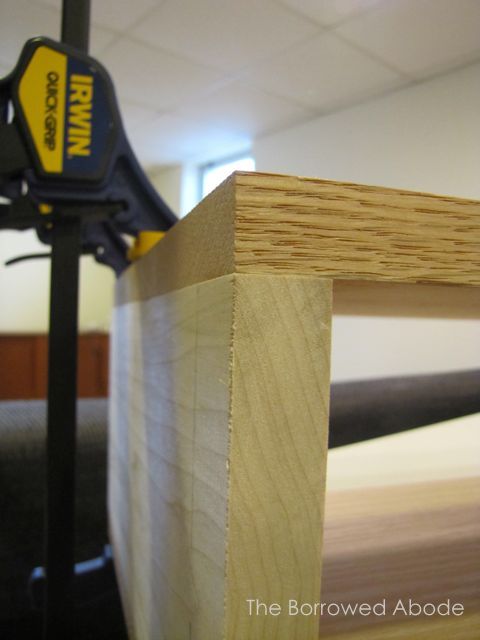
9. Then came the waiting game. I waited a full 24 hours before attaching the legs, to ensure the glue had fully dried. I may or may not have jumped up and down with glee at the sight of the perfectly-joined wood. 🙂
How To Attach the Legs:
For some reason I didn’t get any photos of this part of the process, but it’s really straight forward.
- The round tapered wooden legs come with a threaded metal screw – with a flat end, not a pointy one – sticking out of the top.
- I marked the bottom of the box where I wanted the legs to go: about 1″ inside the outer corners.
- I found a drill bit that was the right size (Slightly smaller than the threaded screw) and drilled holes, being careful not to drill too far through the wood. I didn’t want the drill bit to come out the other side, and mess up the beautiful finish on the table!
- I screwed the table legs into the holes after adding a little bit of glue for extra strength.
SAFETY DISCLAIMER:
These tall and skinny mid-century style furniture legs are not the most sturdy design – I wouldn’t use them for a dining table. But we love the look of them for this piece. Our table sits against the wall, where it is stabilized simply because it’s against the wall. But in reality it’s a heavy wooden box on skinny stilts, so if you were to lean on it it would wobble a little.
This doesn’t bother us. It’s a table made for primarily decorative purposes, as well as to provide a small place to put keys and mail when we come in the house. But when we have kids, we’ll probably attach the table to the wall with a stability brace, kind of like the ones that Ikea furniture comes with.
If you look at long, tall sofa tables you’ll see that most have braces between the table legs, lower down to the ground. We may stain some more red oak and add a stability brace in the future. . . but it’s not a top priority. We’re happy with how things are now. Oh – and it’s been 6 months (holy cow!) and it’s doing just fine.
I’m sharing all this because I believe in honesty about projects, but also because I’d hate for you to recreate this design and be unhappy with the stability of the table.
Next up – I’ll share the overview of the staining and finishing process. It’s too much to cover in one post. 🙂
Supplies Used:
- 2 Red Oak boards, 1″ x 12″ x 4 ft – $50
- 1 Poplar board, 1″ x 6″ x 2 ft -$5
- 4 Round Tapered Wood legs, 26″ – $28
- 1 Wooden Doweling Jig Kit – $29
Total Cost to build an un-stained table: $112
Total self satisfaction at building a gorgeous, perfectly-joined wooden box using NO SCREWS? SO VERY EXCITING! Seriously, I now feel like I can build anything! Next week we’re starting construction on a stair-step style bookshelf for our basement.


8 Comments
Lovely. Totally not my style, but you did SUCH a good job!!
YESSSSSSSSSS! I have that doweling kit, now I just need some time to build. After Artscape, there will be coffee table constructing in my future. Thanks Jane, I think this is my favorite of your projects and it works so perfectly beneath the mirror!
Wow it feels like it has been ages, but I’m back to bother you! 🙂
Thank you for this post! I am planning something relatively similar and I didn’t know they sold doweling kits. How convenient! I do not know when I will get to building it with my insane schedule, especially since it means driving up to my Dad’s to build it. No work space in my studio apartment in San Francisco! Wish me luck!
By the way, congratulations on the beautiful wedding!
totally LOVE the table! And seriously, I had no idea about the wooden doweling kit! I need to get me one of those for sure!
[…] the front door, so that’s where we’re hanging our Christmas cards this year. The entryway table displays a few of my yarn trees from three years ago, as well as a huge pine tree candle I splurged […]
The ends of the screws on the furniture legs are bc they are meant to be screwed into a metal bracket that is screwed to the piece of furniture. They sell the metal table leg bracket at big box stores. It helps it be more sturdy and bonus, if you want to change the legs you just unscrew your old ones and screw in new ones!
Hey Abby! Thanks for the tip – I did see the brackets for the legs but I thought they would be visible because the table is so tall, and I wanted a more streamlined look. I think if I make another one, though, I’ll find a way to include the brackets. That sounds much more sturdy.