Last stop on the office/dressing room makeover? My closet area. Because it’s not just a sewing room & office, it’s also my “dressing room.”
I”m about to go crazy with TMI on the closet installation, so if you aren’t that interested feel free to skim along. But I want to make this detailed for two reasons: to help any other renters or landlords who may be considering closet renovations, and (more importantly) because we forgot to ask our landlord before doing this – so this post will serve as an explanation.
Dear Brian, aka Landlord Extraordinaire,
We love your fabulously renovated house, with the luxurious kitchen and bathrooms, and nice new windows, and new efficient furnace and HVAC units. In fact we’re looking forward to renewing the lease to stay another year.
Unfortunately, we did not love the design of the bedroom closets. You know by now that we always ask permission before making changes, but we kind of slipped up and truly forgot to ask before completely redoing them. You see, when I get excited about a design idea, I often dive eagerly ahead. Usually Ryan keeps me in line, saying something along the lines of “that’s a great idea, but do you reall need to stop everything and do it right now, in the middle of dinner?” That didn’t happen this time, thus I blame Ryan.
But before you freak out, please read on – because I’m about to make a case for this that is more air-tight than a submarine. Now I’m going to revert to writing this as a blog post rather than a letter.
When our rental house was remodeled prior to move-in, the closets were updated with new ClosetMaid shelving. After living with it for a while, Ryan and I both concluded that the ClosetMaid system is not the best choice for a rental home.
Here’s how the installation of ClosetMaid works. For each shelf / hanging bar you want to install, you must:
- Drill a million holes in the wall.
- Install a million big plastic anchors.
- Screw shelf into wall, hoping it went up level.
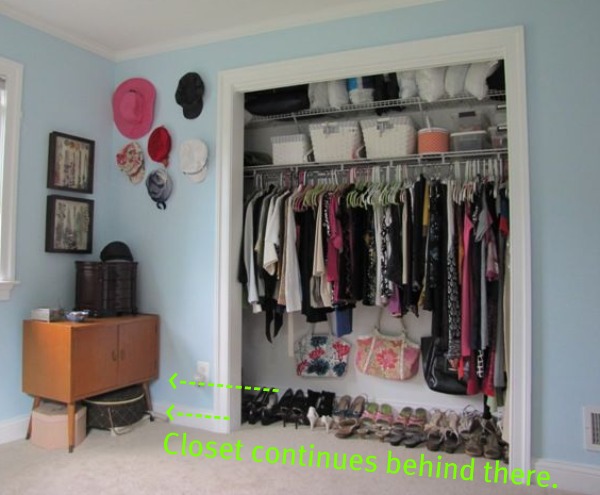
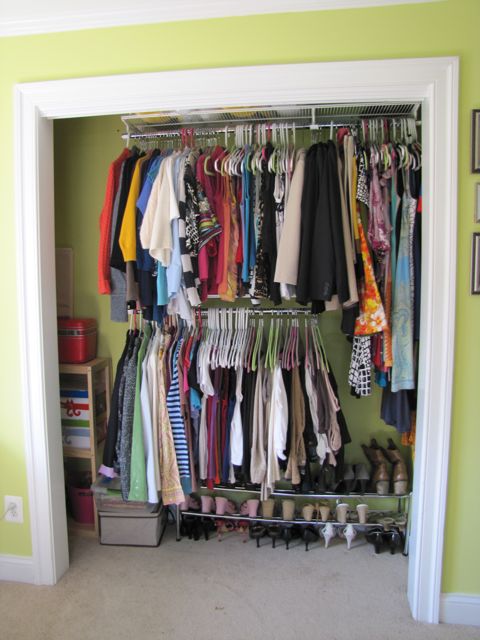
My closet had two shelves and one hanging bar. The closet was 8′ wide, and those shelves & bar ran across the entire 8′ of the closet. However, the opening was only 5′ wide, which meant that a long 3′ of hanging space & shelving was inaccessible in the left side of the closet. THe closet is only about 2 feet deep, and the shelves were 21″ deep, so it was pretty much impossible to squeeze into that 3-foot recessed area. And I needed to use that space.
I figured out that the most efficient use of the closet was:
- Two-tiered hanging space in the 4-foot-wide open area
- 20-inch-deep storage shelves (for out-of-season clothes, etc) going up the wall in the harder-to-reach back corner of the closet. (The section to the left in the above photo.)
Because the ClosetMaid system required that each shelf be installed separately, with the use of a gazillion anchors, I decided to install the Elfa Easy-Hang system from the Container Store instead. But before we could install it, I had to:
- Remove the old shelves.
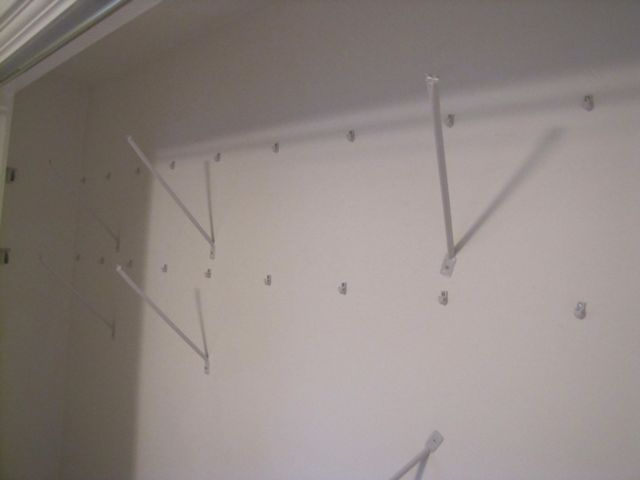
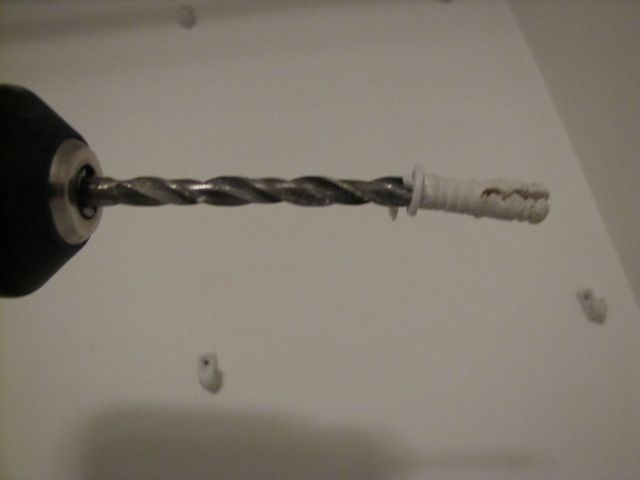
- Drill / pry out all the anchors (see below). The shelves are secured with big metal pins that go into the anchors, not screws, so you can’t just unscrew the fasteners.
- Patch the million holes in the wall.
- Re-paint the closet wall. Because I had to paint the wall, I decided to carry the color from the room into the closet.
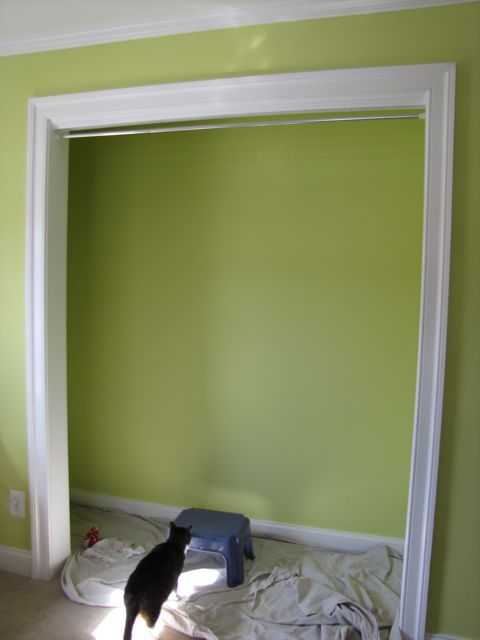
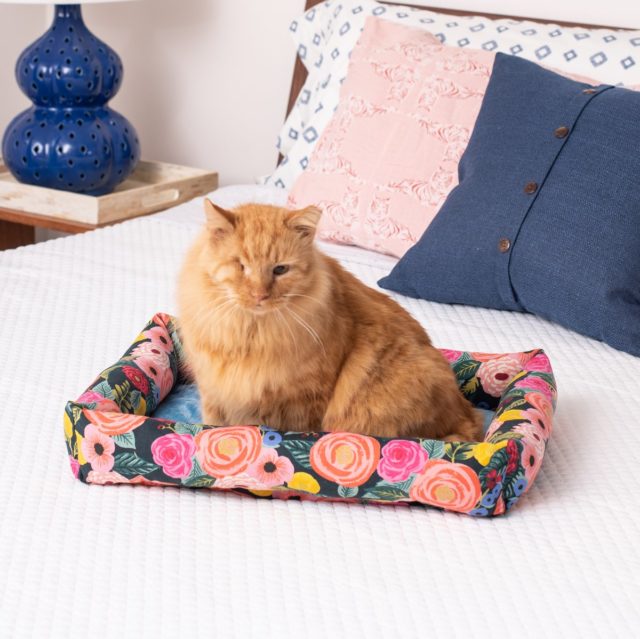
Painting Tip: Wait until the paint is dry before allowing the feline inspectors to do the final run-through.
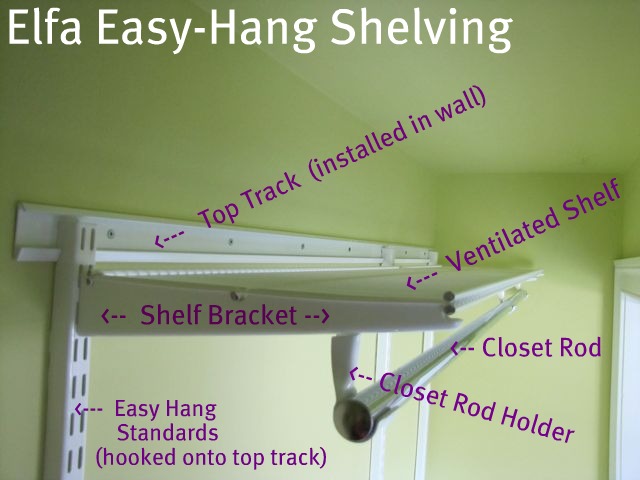
Now here’s how the installation of the Elfa Easy-Hang system from the Container Store works. The Elfa system hangs off a top track, which is the only part you actually have to screw into the wall. Therefore, you:
- Position the “top track” up against the top of the wall, ensuring it is level, and trace (onto the wall) the places where the screws and anchors must go.
- Drill holes with a 3/8″ drill bit.
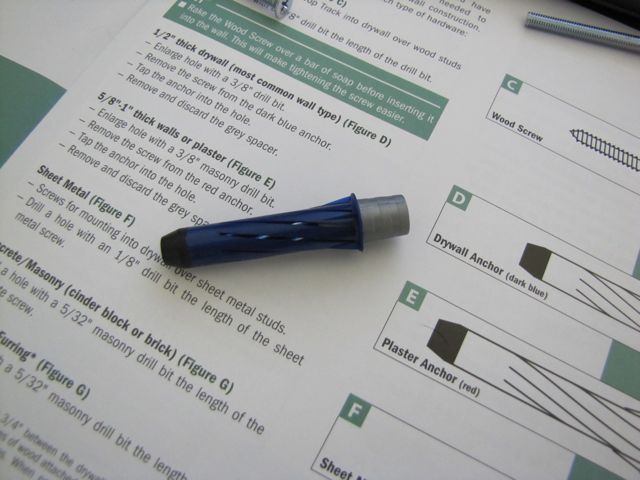
- Install Elfa Anchors. (I do use the pricier Elfa ones just because I trust them more.)
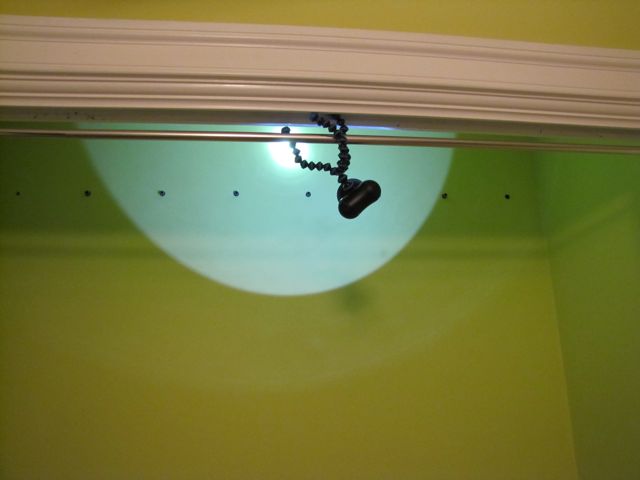
To hang Elfa on this wall, it only took those 8 anchors at the top. A nice improvement from the more than 30 used by ClosetMaid!
- Install the Elfa Top Track by screwing it into the anchors you’ve just installed.
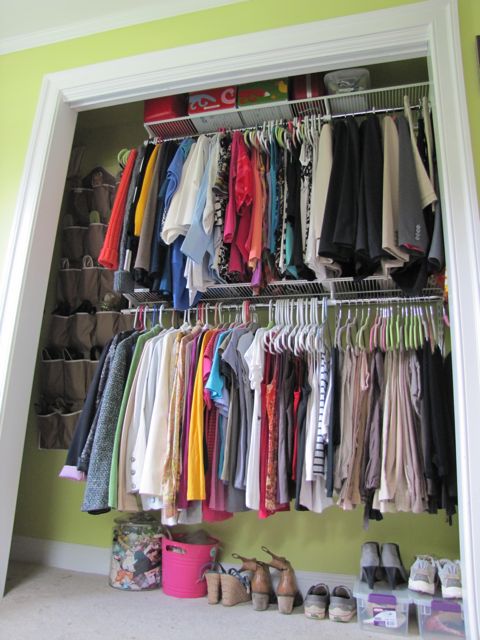
- Then, simply hook the “Elfa Easy Hang Standards” onto the the top track, and click your shelves into place on the “Standards” wherever you want. Here it is installed:
Remember, the ONLY holes I had to put in the wall were for that top track. The rest of the system hangs off that top track with the “Standards” flush against the wall. It’s very, very sturdy.
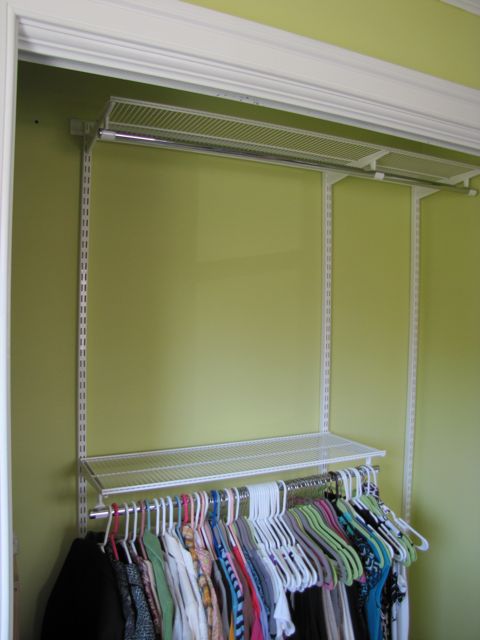
Here’s another shot of the installed system. Why is it so perfect for a rental home? If a future tenant wants to change the shelving, they simply take the shelves off the Standards and click them into a different place on the Standards.
In the end I made the bottom hanging shelf shorter than the top, so that some of the top hanging space could be used for long hanging, like dresses. I didn’t install the shelves in the back, left portion of the closet yet. I wanted to think on it before making that part of the purchase.
And it’s a good thing, because this weekend I’m going to change the design a bit. I’m going to convert the front area to all “short” hanging, and put a hanging bar for long dresses in the back portion of the closet, with shelves above and below it. Like I said, I think that will be the best use of the space.
In conclusion, I think the Elfa Easy-Hang closet system from the Container Store is the best option for closets in both rental and owned homes. It offers superior functionality that can be easily changed and reconfigured with no damage to walls. So if you have a different tenant every year, and each tenant wants a different layout of shelves and bars, they can move things around without removing anchors and drilling new holes. It’s not the most inexpensive system to install initially, but I think it’s worth every penny.
Speaking of cost, the total cost for my two tiers of hanging space up front, and long hanging / shelves in the back would have been $300. However, I bought most of the components during the Container Store’s bi-annual Elfa sale, and saved 30%. So $200 for a totally functional closet? It still took a chunk out of my wallet, but it was worth it. After all, you’re more likely to put your clothes away where they belong when you have a closet that’s easy to use.
5/10/2011 Update: I finished the closet, which now looks like this. It’s awesome, read more here.
PS: This was completed in February. I dreaded having to explain it all, that’s why it took so long to share. But after I install the rest of the system this weekend, I’m making a video tour of the entire studio makeover, and then I’ll finally be done talking about this room.
PSS: Come back later (or Saturday) to find out the winner of the 2011 Redneck Yard of the Year contest!



24 Comments
Love it! Rubbermaid makes a similar system (that I got at Lowe’s since there isn’t a container store close to me 🙁 ) And I love it, I even was able to adjust the shelves for different seasons (more room for sweaters than for shorts etc)
Love it!!!! I put in a similar system by Rubbermaid (from Lowe’s since there’s no container stores close) and I even alter them for the changes in the seasons… moved my sweaters out and brought shorts in that space etc… they are great!!!
I’m so jealous! I want Elfa. It looks great!
i am huge fan of elfa & use it!!
I put freedomRail in my house – it was more adjustable than elfa, only has the rail to install and you can design and purcahse online!
Wow – your pictures and explanation of this make-over are awesome! I am kind of exhausted just thinking about how much work this must have been — but it seems so much more usable.
Nice! That seems like a much better way to store everything. It seems like an odd decision to make 3′ of the closet inaccessible like that in the first place though … Great way to make it work for you 😉
Exactly! Why closets are ever made with that section that you can’t reach
is beyond me – but all older houses seem to have that design to the
closets. If the space were deep enough for you to shimmy back in there to
see what was hanging, that would at least be an improvement. Oh well.
Good tips. I’m going to redo our clothing storage as well, and this could save me a ton of time.
awesome post! I’m having my husband read it to convince him that this is what we need to do in our new home! 🙂
Looks awesome! Now i just have to wait for the next Elfa sale!
Yes, I’d definitely recommend waiting for the sale 🙂 But take it from a
cheapskate (me) – I do think it’s TOTALLY worth the investment!
This is great advice. My closet is huge but very poorly set up to maximize storage. Thanks for the reco on Elfa!
[…] changed the layout of the front. (Last Friday when I shared my love of Elfa shelving it wasn’t done.) Now I have two complete bars of short hanging space going across the 4-ft […]
[…] Studio Closet Makeover ~ @ The Borrowed […]
I love the Elfa system, it is versatile and affordable. I love how you show how easy it is to install, great job!
Could you put some bi-fold doors on the closet and still have room for the clothes to fit in? I’m designing my closet now and trying to figure out how deep to have it. Trying to conserve space in a small bedroom. Thanks
Hi,
I think bi-fold doors would work ok, but I’d allow a little extra depth inside for the room they take up as they fold out. I think they’re a much better alternative to sliding doors on a tiny closet.
Hope this is helpful!
-Jane
[…] along the way I shifted shelving in the closet and on the walls, customized and accessorized, and ended up with a room that was what any room […]
looks great!! love it!!! btw, do you know what the elfa means?
[…] Comparing Container Store Elfa Shelving vs. Closet Maid | The …Apr 29, 2011 … Now here’s how the installation of the Elfa Easy-Hang system from the Container Store works. The Elfa system hangs off a top track, which is … […]
Love it. I did the same for my closet, went to Lowes purchased the Closetmaid shelf track, $90 later my closet looks amazing and identical to this. My closet is 8 feet but really oddly shaped.
Jane! I googled elfa vs. closetmaid and your blog immediately popped up! I know it’s going to be super helpful as we transition back to renting. What’s the yellow paint color on your walls? It looks just like the color I painted our screen porch doors – love your style 😉
Hi Lauren! So funny!! I have to say- you really should go with Elfa over Closetmaid. Yes, Closetmaid is cheaper, but . . . it’s much harder to hang well and is more damaging to walls. I’ve done it in several places. Elfa, that is. The wall color is actually a kind of fresh green/yellow blend. I will find out and let you know.
The paint is Sherwin Williams’ “Lively Yellow”. But I think it’s totally more green than yellow.