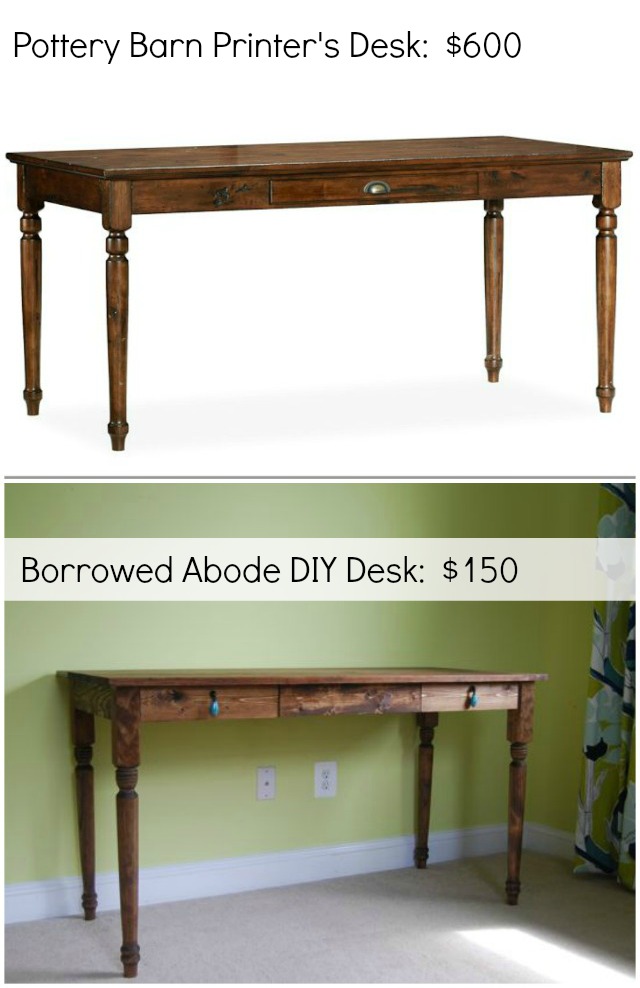
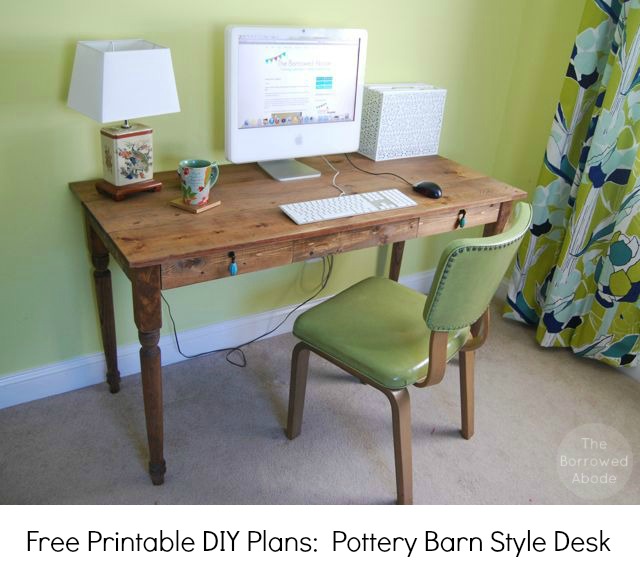
I have finally finished writing my printable DIY plans for making a Pottery Barn Style Farmhouse Desk like the one I built for my office.
But first, some background for anyone new around here:
Tired of the lackluster white Ikea desk in my office, I decided to DIY my own farmhouse-style desk, inspired by the Pottery Barn Printer’s Desk. I didn’t have plans, I didn’t have experience building tables, but I did have the determination – and when it comes to DIY projects, sometimes that’s all I need.

Building custom means you can create furniture that fits your space just right while saving money. Therefore, I measured my wall and measured my Ikea desk and then figured out exactly what dimensions I wanted.
It turned out that my two dark shelves from my old apartment’s guest room were the perfect length for the desk top, and I had a third pine plank on hand to complete the top.
Since the process was long, I created a printable PDF of the cut list and building instructions. I don’t know how to use Google sketchup, so it’s just images and text instructions, but I hope that it’s enough to help anyone who wants to make one themselves.
You can download the Farmhouse Style Desk Building Guide and print it out out to have handy as you work.

Project cost: Approximately $120.
Time needed: Approximately three to five half days, or one good weekend. (Unless you procrastinate on steps like I do.)
If you have any questions about building it, just ask in the comments and I’ll answer in as much detail as possible.
Shared at the Sawdust Throwdown link party!


26 Comments
I’m gonna try and get my dad to build this for me since I’m not handy with power tools. LOL.
Do it!! And you should ask him to teach you. power tools are the best!!
[…] how I blog. Take, for example, the fact that I went silent on you while I was trying to finish my farmhouse desk DIY tutorial. I got this idea in my head that I shouldn’t blog about ANYTHING else until that post was […]
[…] I built my Pottery Barn style desk, I had to take extra steps to ensure that the legs were installed in a sturdy fashion. I detailed […]
THANKYOUTHANKYOUTHANKYOU for posting this how-to. We actually just picked up a small farmhouse table from our local ReStore with the plan being to replace the aprons with slightly taller ones and incorporate a few drawers. But drawers are scary. But you made them look scary -simple! Awesome job!
Hi Beth! So glad you found it helpful! Drawers scare me too – that’s why I built them totally with wood rather than trying to measure and install metal gliders or whatever they are called. 🙂 Thanks!!
[…] of course, we have my desk, which I built myself from scratch. The art hanging over the desk is thrifted and handed […]
[…] Custom built farmhouse desk […]
[…] The Pottery-Barn-Inspired desk I built for my office was, by far, my most favorite project of the year. I still love it just as much as I did the day I finished building it. You can find a printable PDF How-To Guide here. […]
O.k, it’s killing me, where did you get your office curtains?
I love them and need them for my dining room! Btw, love this site, great job!
Hi Tiffany! Thanks so much! They’re from Ikea. However I just checked the site so I could grab a link for you. . . and they’re not there anymore. Ugh. They were called the Stockholm Blad curtains. Maybe you can find them on ebay or something?
[…] freebies, ana-white, the borrowed abode, homehardware and […]
Love the pattern. Want to try it. How long are the legs. Where did you find these? Thanks
Thanks so much! I found them at Home Depot. Lowes also has some, and you can get them online too if you google “unfinished wood table legs”
Hello- could you tell me the color stain you used? Thanks!
Hi Jane. I am amazed at your woodworking talent! I am going to attempt the desk using your plans….my first project, gulp. One of my many questions, why is the back apron measure longer than the desk top? What am I missing?
Hi Nikki – thank you! I’m so sorry for the confusion. I just checked the plans and that’s definitely a mistake. I don’t know how it slipped past me when I edited it. Let me check my measurements tomorrow and get that fixed.
Thank you, Jane…you have inspired me. One more question, if you don’t mind. If one were to “try” to attach an unused footboard to the desk, in a hutch fashion, how might one attach it?
Hey Nikki – I’m not sure exactly what you mean. Can you link to a photo that shows what you have in mind, or explain a little more?
Hey Nikki – I just checked the measurements. I made a huge mistake! My table top boards (i.e. the desk top) measure 54″ wide. THe apron measurements in the plans are correct. So sorry! I will have to find the editable version of this document before I can update it.
Thank you for the measurements!!
Unfortunately, my idea is in my head…no link to that (good thing). The footboard is raised panel, with crown moulding at the top. I will reinforce the attachment from behind on both back corners with upright supports, from desk to footboard. I’m just not sure of the sturdiest way to attach the legs to the desktop.
I think I’ll use a screw from the bottom of the desktop up through the legs.
Oh, now I get it! That does sound like the best approach. Especially if you have a reinforcement. Would love to see the finished project!
Hi Jane, Thank for useful post, I am working from home and I really want to have a small table and chair like yours. 🙂
Nice ! Here is where I am and still thinking of what to build the legs of the desk from…I do not like the looks of using pipes so i might have to build something custom for legs :
http://mandvisdiyblog.blogspot.com/2018/02/how-to-diy-build-l-shaped-office-desk.html
What are the dimensions of this desk?