If you’re searching for an easy but appreciated DIY hostess gift, this fancy flour sack towel tutorial may be just the thing!
Because these can be made with or without a sewing machine, I thought they’d be the perfect first tutorial to share in the Stitch It series that I’ve been wanting to write for ages.
I whipped these up at Christmas as a gift, but if you just switch up the fabric, you can make these flour sack towels for any season or color palette.
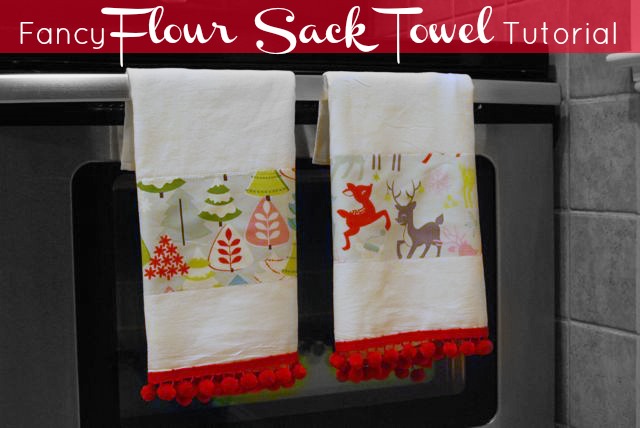
I didn’t take photos of the process because I was busy just trying to get them made – but I think it’s simple enough that you can follow these easy steps:
Materials Needed:
- Flour sack towel
- Cotton quilting fabric – at least 1″ wider than your flour sack towel
- Pom-Pom Trim or other trim of your choice – at least 1″ wider than your flour sack towel
- Iron-on hem tape
- Iron
- Sewing machine – OR – needle and thread
Let’s Get Stitching:
1. Measure the width flour sack towel and cut a 5″ strip of patterned fabric that is at least 1″ wider than your flour sack towel. For example: My towels are 30″ wide, so I cut my patterned fabric strips at 31″ x 5″.
2. Using the iron-on hem tape, adhere the fabric strip to the towel at the spot where you want it to go. Make sure you center the strip so that a 1/2 inch of fabric sticks out at each side of the towel.
- Sewing Machine Version: I just use a few pieces of iron-on hem tape to help hold the strip in place for machine sewing.
- No Sew Version: Use extra-strong hem tape to adhere all the edges. Iron on high heat with steam for best adhesion. See photo below for where to use the tape.
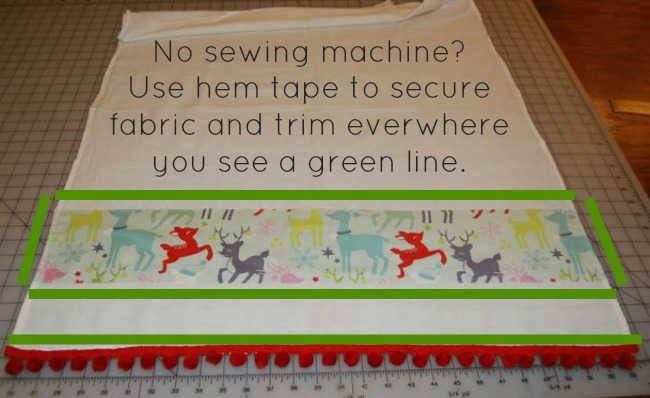
3. Once the strip is adhered to the front, turn the towel over. Fold the flaps of patterned fabric over and use more iron-on hem tape to adhere them to the back of the towel. Before I iron them on, I like to trim them to be nice and neat, just the width of the towel’s hem. (See detail photo below.)
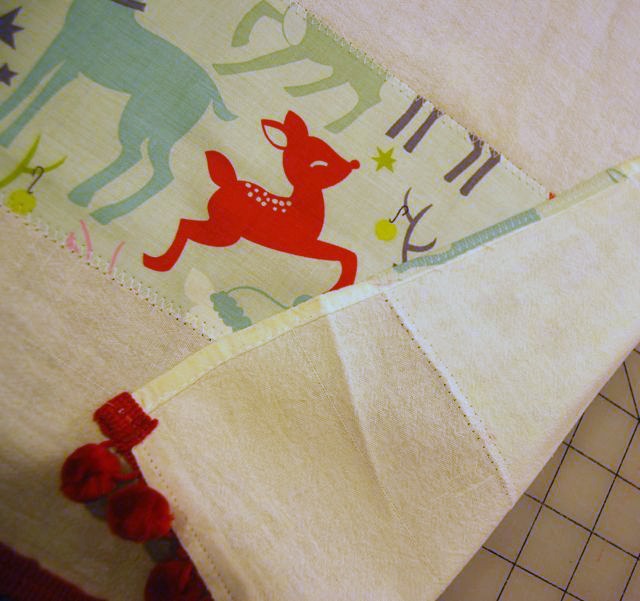
4. Repeat this iron-on hem tape process to adhere the fun trim (pom-poms or whatever trim you choose) to the bottom edge of the towel. Don’t forget to fold over and trim the ends again. Again, if you aren’t going to use a sewing machine, iron and steam this carefully to get a good adhesion.
5. Stitch it!
- Sewing Machine Version: Use a regular presser foot on your machine, and set the machine to a medium-width and length zig-zag or overlock stitch. Sew along every edge of the patterned fabric to attach it well and prevent fraying.
- No-Sew Version: If you’ve used heavy-duty hem tape and have ironed it really well with steam, it technically should be fine. However, I’d recommend threading a needle and just putting a simple running stitch along every edge. This is easy to do while watching TV, etc.
6: Iron it and admire your work!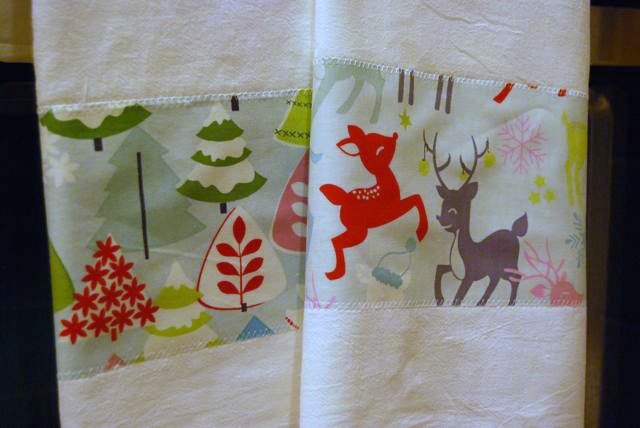
I hope you found this tutorial useful. Please, if you have any questions or are confused, let me know in the comments below! I promise I’ll answer – if not today, within a few days. 🙂
New to sewing and wondering what supplies you need? Check out my fabric bunting tutorial for a list of my must-have sewing supplies.


8 Comments
Ok, I need tips for keeping the towels nicely folded over the oven handle! Mine always slide off or end up bunched up and looking sloppy. Been thinking of even sewing a button or velcro onto mine to secure them to the handle. Is there a secret or am I just a slob? 😉
Um. . . yeah, I can’t help you with that. Mine don’t slide off, but then I’m a bit particular about putting them perfectly on the bar. Velcro is a great idea, though!!
I think this is something that even I can do… 🙂
You absolutely can do it! And the best part is you can get so creative with it. I’d love to see it if you do!
Super cute towels. Thanks for the tutorial.
Amy, you’re welcome! Glad you liked it!
[…] Blogged: Fancy flour sack towels tutorial […]
[…] Fancy Flour Sack Towel Tutorial from The Borrowed Abode […]