During the last few weeks I worked on several projects to kick-start my guest room makeover, but the one I’m about to share with you is the most exciting to me!
Do you remember the old twin bed frames that I rescued from my parents’ basement?
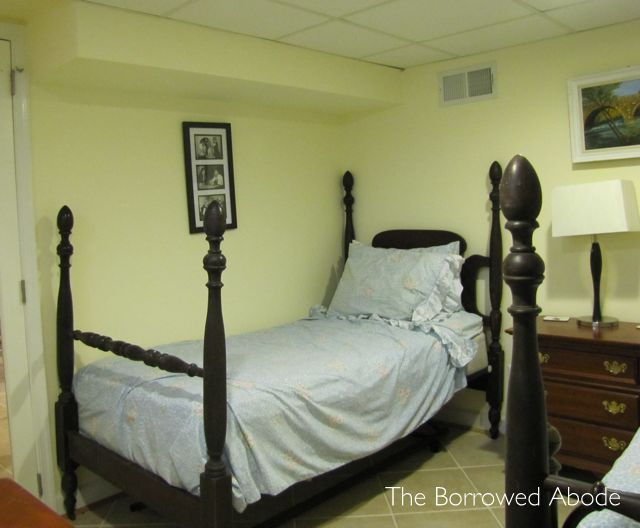
Our guest room is very small, with a low drop ceiling and a small window, and because of these factors, we need to keep the room feeling as open as possible. All it took was one glance at the above setup for me to realize that the four-poster style of the foot boards was too tall for the room.
Determined to use these curvy old bed frames, however, I devised a new, and perhaps wacky, plan. What if I were to cut out the middle section of each foot board, then re-attach the top finials to rereate a shorter version of the originals?
Confused? Here, let me show you what we did.
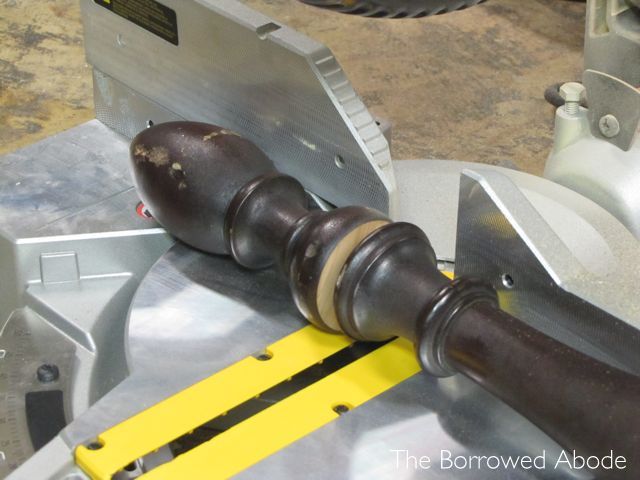
We lined the foot board up on the compound miter saw, and clamped it in place to help keep it steady.
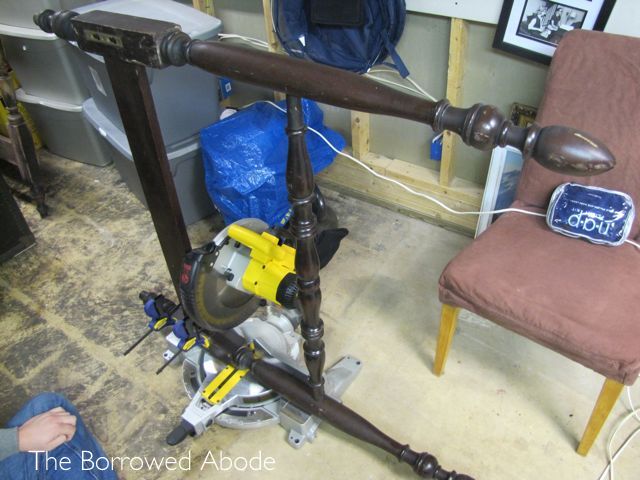
Ryan made the first cut, as I anxiously watched and worried.
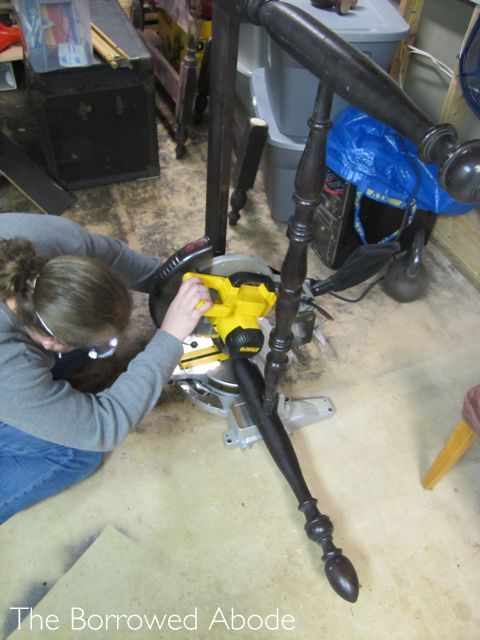
Ryan did an amazingly perfect job, slicing right between the square post and the beginning of the rounded post, and I lavished him with praise. Really.
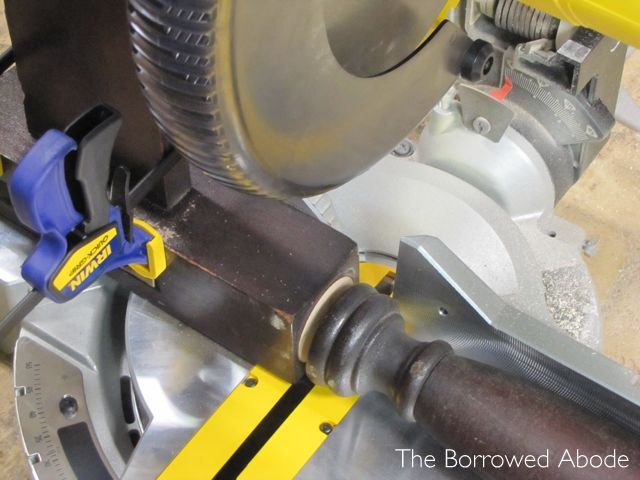
Ryan made yet another perfectly-lined-up cut, this time removing the top finial from the rest of the foot board. More praise for Ryan.
We repeated the process until both foot boards were dissected like this:
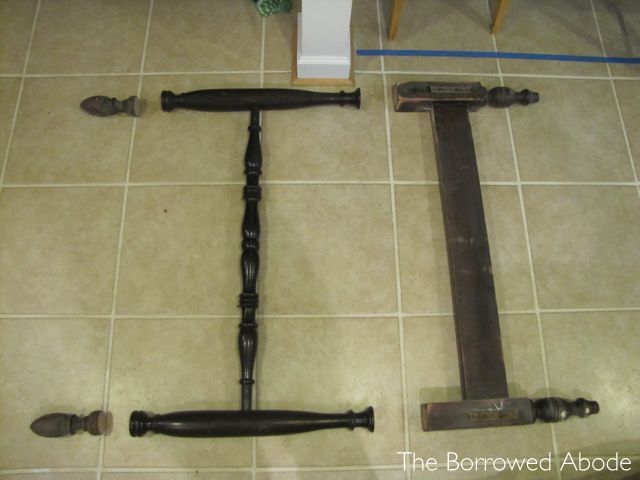
Next step? Securing the top finial to the bottom of the foot board.
I traced and cut out a circle the size of the finial’s base, then found the center. I made a tiny hole in the center of the paper template . Then I taped the paper template to the finial, marked the center of the wood, and repeated with the other three finials and all four bases that I needed to attach them to.
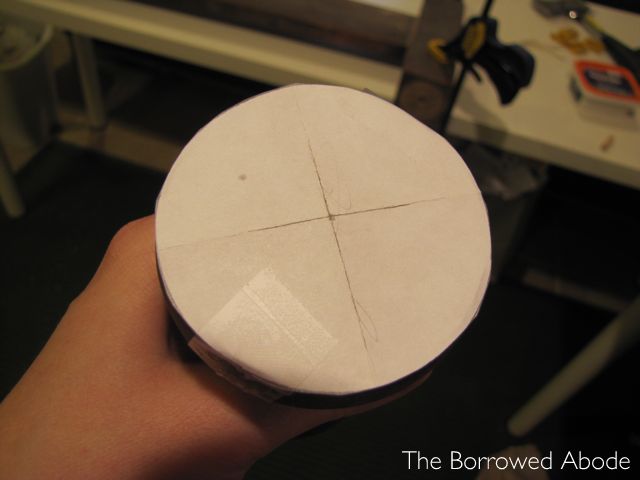
After clamping the wood to a table for stability, I got ready to drill.
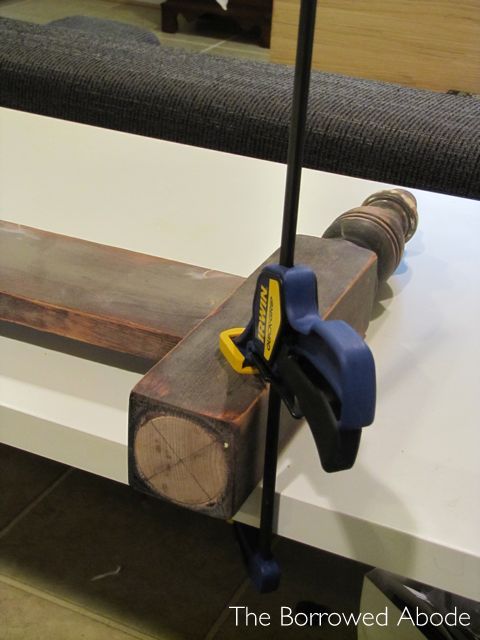
I used the drill bit from my new Dowel Jig Kit (more on this in another post) to drill a hole into each piece. The drill bit was perfect because a) it made holes big enough for the wooden dowels and b) it has a super-sharp spike on the end so there’s no chance of the drilled hole being off-center.
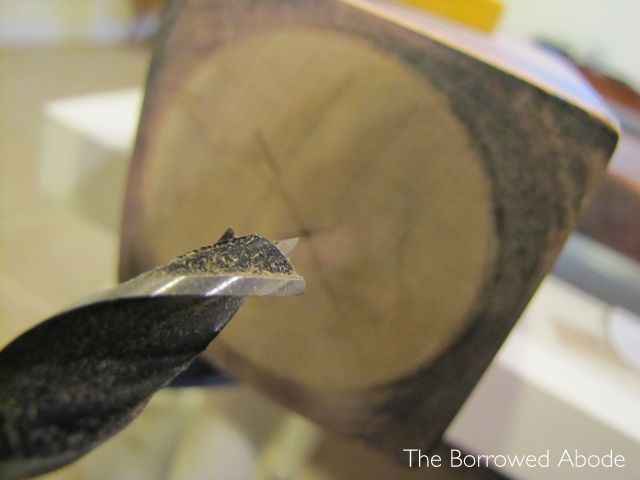
Once the holes were drilled, I put some glue in each hole, then added the wooden dowel. As a final assurance, I smeared some wood filler around the base of the finial, just to ensure that I got a smooth, gap-less seal with each assembly.
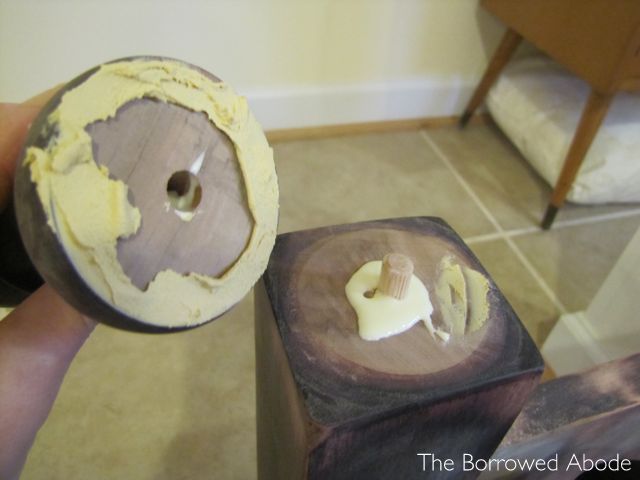
I pushed the finial firmly onto the dowel, wiped off most of the excess glue and wood filler that oozed out of the joint, and then taped the whole thing to hold it steady to dry overnight.
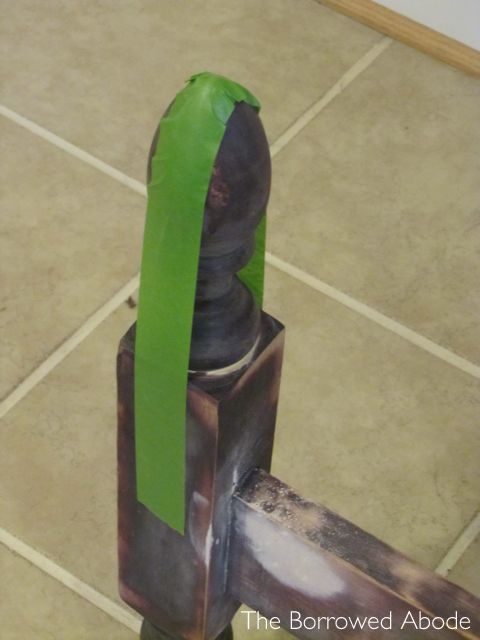
The next day, I removed the tape and had two new, smaller foot boards!
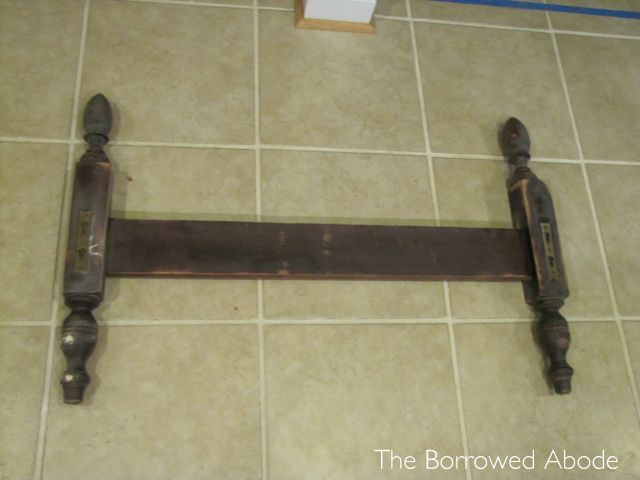
I am so excited with how well this turned out. Next step? Painting!
I know this may not be everyone’s cup of tea, altering antiques like this, but it works for us. This way we’re able to use the old bed frames, which haven’t been used for at least 35 years, and they still retain some of the original character.
Have you ever significantly altered an antique or other piece of furniture just to make it work in your space?
PS: I’m planning a local blogger meetup for Sat. Feb 4th. No details yet, but please email me if you’re in the DC area and are interested!


14 Comments
Dan and I rescued some old end tables from my grandma’s basement, sanded them down, and spray painted them a fun red-orange color. Not only do they look like new and function great in our space, but now I want to spray paint EVERYTHING! 🙂
I’ve wanted to do this to our bed for a long, long time! And for the same reasons you mention. The problem is that it’s iron. My boyfriend says he can work with it though… so now I’m waiting!
Great job. May I ask how tall the finished footboards are?
I don’t think you have a lot of small kids around, but if it’s not tall enough, a bedpost like that could be the perfect place for a sneaky bed-jumper to lose an eye. :>)
This is a great point. I’m not exactly sure how tall the footboards are now, but they’ll be a little higher than the mattresses. Maybe 3 ft? We don’t have kids, and these are going in the guest room.
It didn’t occur to me that it could be a safety issue because my childhood bed was actually quite similar, and the same height, and nothing ever happened. Of course, that doesn’t mean there couldn’t be a problem with my kids some day. I’ll definitely keep that in mind – thanks!
lol… I’m the resident worrier…. looks like I’ve now taken to worrying for other people.
The beds are cute, hope they turn out just like you want them to!
I’m interested in seeing the end result. I think slicing and dicing antiques is cool.
Awesome work! They look perfect. I can’t wait to see how they look painted! Man, I wish I could come to your blogger meetup. =(
GREAT idea! I actually have a table I want to do this with and seeing how awesome it turned out for you really inspires me to actually get it done.
I love it.
And it doesn’t take finials to have kids hurt themselves on beds. I have a story I will tell you some time.
Hey lovey poo! love this post! tried to pin some of your images and it says it cannot find any images on this page (and a few others) — any clue why?
Hi! First – thank you! It’s sweet of you to let me know 🙂
I tried pinning and it’s just fine for me, so I have no idea what that is all about. Grr, technology…
were you pinning from your main site or the individual post? i can pin from the site not the posts. i’m gonna try again in a few.
[…] First, Ryan helped me re-size the tall footboards, which would have made the very tiny room feel too cramped in their original […]
[…] for the beds . . . oh I love how well the beds turned out, from rebuilding the too-tall footboards, to painting them, to upholstering the side-rails with chevron […]