

Over the weekend I put the finishing touches on the Janery sewing studio, and I couldn’t be more excited to share them with you. I’m so sorry I left you hanging last week, by the way. I had business travel which left me with zero down time.
To make up for my absence, I’m going to have a slew of little project posts this week. Most are simple, cheap, and easy – don’t you love projects like that?
There is one egress window in my sewing studio, thanks to its basement location. It’s great for letting in afternoon sunlight, but when I transform the space into a temporary guest room for overnight guests, I need to have the window covered for privacy.

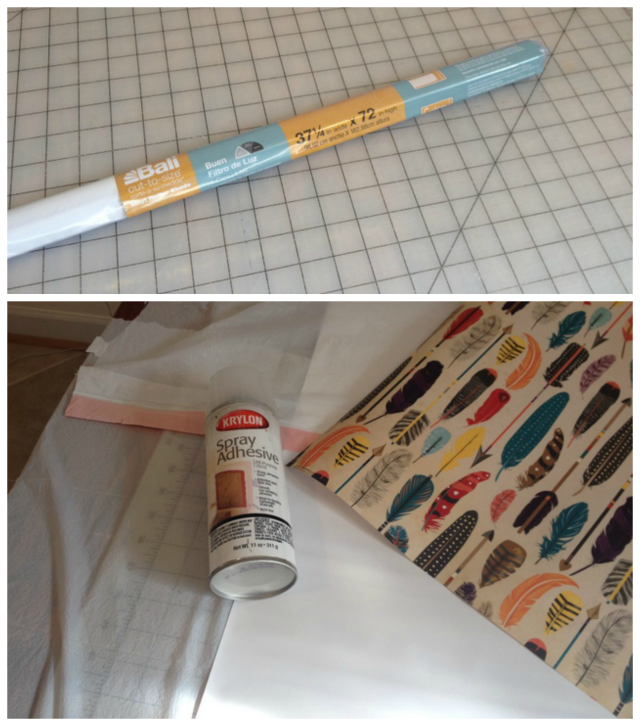
The window is so small that it doesn’t lend itself to drapes or anything grand. After a quick peek at the blinds at Home Depot, I chose a plastic roller blind and had it cut to size. It was cheap. It was easy to install. And most importantly, it looked easy to beautify!
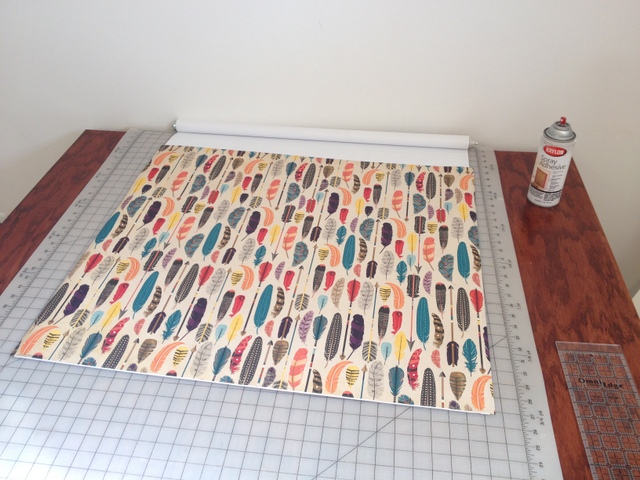
My first plan was to use ModPodge to adhere pretty fabric to the blind, but I couldn’t find any that I really wanted. I did, however, have a pretty roll of feather print wrapping paper from Paper Source that I had wanted to use in the room.
I had no idea if I could coat the blind with paper, but I figured it was worth a try, right? What’s the worst that could happen?
- I covered the table with plastic garbage bags for protection.
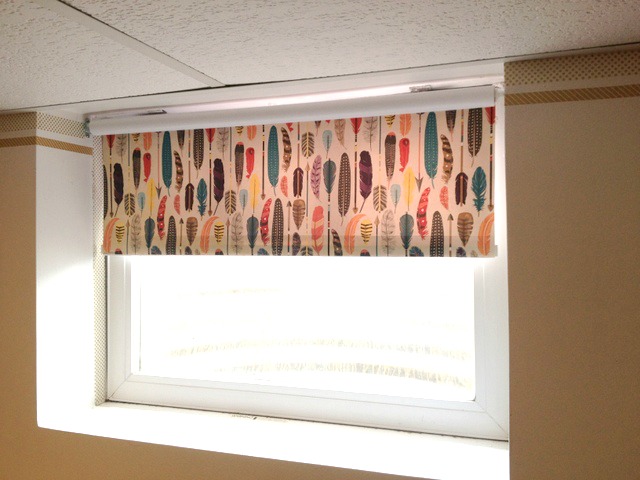
- I unrolled the blind and sprayed the bottom 30″ with adhesive.
- Then I placed the paper over it, and gently pressed it onto the sticky blind, smoothing from the center out to the edges. I only covered the first 30″ because the window was only 25″ tall.
- Then I installed the blind in the window well, and rolled and unrolled it a few times.
It worked! The paper stayed on just fine!
I didn’t like how ugly and unfinished the top of the roller blind looked, however. It needed a little valance, so on a whim I made a tube of paper the width of the window, and taped it shut. Then I flattened it so that it was about 4″ tall, and slid a tension rod through it.
Voila.
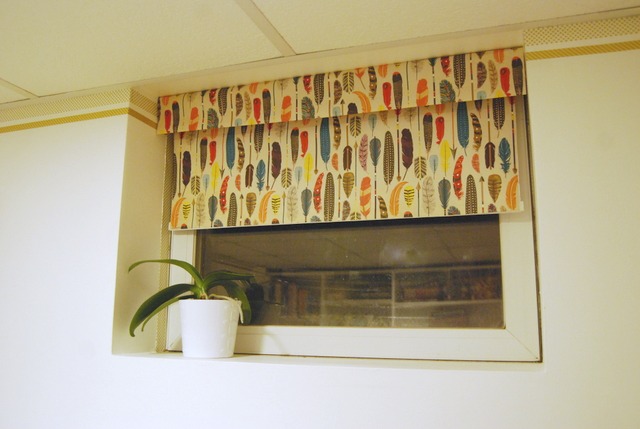
So far this project is holding up well. If I do have any problems down the road, I will let you know. I don’t expect the blind to get a ton of use, because it will only be pulled down for guests. If you have a blind that will see a lot of use you may prefer to use fabric.
Supplies & Cost:
- Roller Blind – $8
- Decorative Paper – $7
- Spray Adhesive – already owned, but cheap
- Tension Rod – already owned, but cheap
- Total Cost: $15
In case you missed it:
- Studio Makeover, Part 1: Removing Temporary Wallpaper
- Studio Makeover, Part 2: Embrace White Paint
- Studio Makeover, Part 3: A Shelving Fail
- Studio Makeover, Part 4: Shelving Dilemma
- Studio Makeover, Part 5: Another Shelving Fail
- Studio Makeover, Part 6: Custom Shelving
- Studio Makeover, Part 7: Shelving Progress
- Studio Makeover, Part 8: Completed Built-Ins
- Studio Makeover, Part 9: Unifying the Cabinets
- Studio Makeover, Part 10: Perfecting the Faux Built-Ins
- Studio Makeover, Part 11: DIY Gold Cabinet Hardware
- Studio Makeover, Part 12: Furnishing my Serger Corner


4 Comments
That wrapping paper is gorgeous – and I was totally fooled that it wasn’t fabric! (Though a pattern that pretty should be fabric – think of all the amazing things you could sew with it!)
I love the economy & practicality of this project. I like that you gave it the investment the situation was worthy of instead of going overboard to make it more than it needed to be. We need more of that in life. What a great lesson is making something beautiful and simple. Thanks for sharing this.
[…] I upgraded a cheap plastic roller blind with some decorative wrapping paper. It provides a pop of color and privacy when this space […]
[…] Window Shade – Post here […]