Last night at midnight I finished transforming my (antique?) twin bed frames for the guest room. Now I finally feel like I’m really getting somewhere with the guest room makeover!
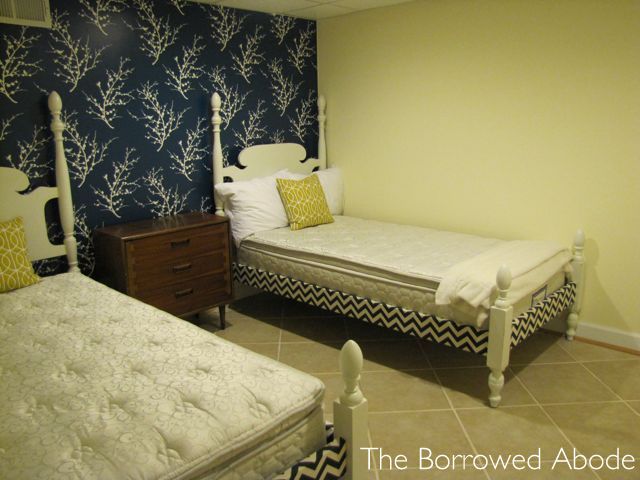
I got the beds in November, but this is real-time decorating, my friends. Decorating fit in amongst work, wedding planning, Etsy shop running, and too much business travel. This is also decorating that was fit in amongst the whims of the winter weather – which this year, thankfully, weren’t as bad as in years before.
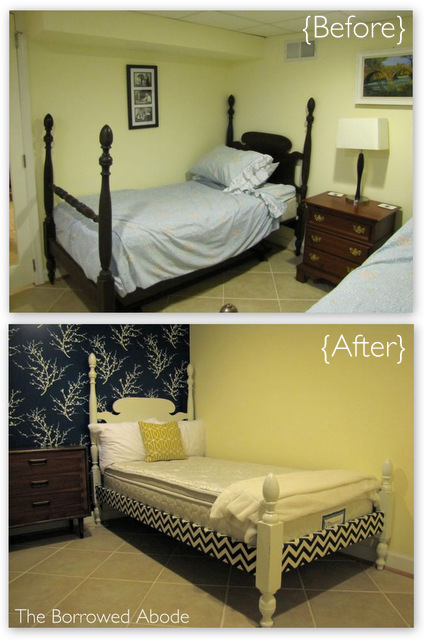
Here’s how I got from the original, dusty and rusty frames that cluttered my parents’ basement to the current awesomeness:
First, Ryan helped me re-size the tall footboards, which would have made the very tiny room feel too cramped in their original size. Next up – sanding, filling scratches, priming, painting, and finally sealing. These steps caused the long delay in completion. The painting and poly sealing had to be done outside in moderate weather, and many weekends were spent hauling the frames out of the basement and into the yard for a few coats of paint or sealer. You can find the detailed painting process here.
At this point, the bed frames entered the guest room – but they weren’t ready for sleepovers just yet!
Some of the wooden side rails were pretty beat up, with large chunks of veneer broken off the visible sides. Even though I was painting and not staining, I didn’t think I could do a good job of patching the missing strips of veneer. Instead, I decided to upholster them with fabric – covering all the imperfections and adding a little extra awesomeness to the frames.
Here are the upholstery steps:
1. Cut strips of fabric that are 2 inches longer, and 3 inches taller, than the bed rails.
The chevron fabric I used was only 54″ wide, with the stripes going in that direction, so I had to sew two pieces together to make a long enough strip for the long rails. I matched up the patterns to make the seam less visible. To ensure I sewed in just the right spot, I first used iron-on hem tape to seal the seam together. Then followed up with the sewing machine.
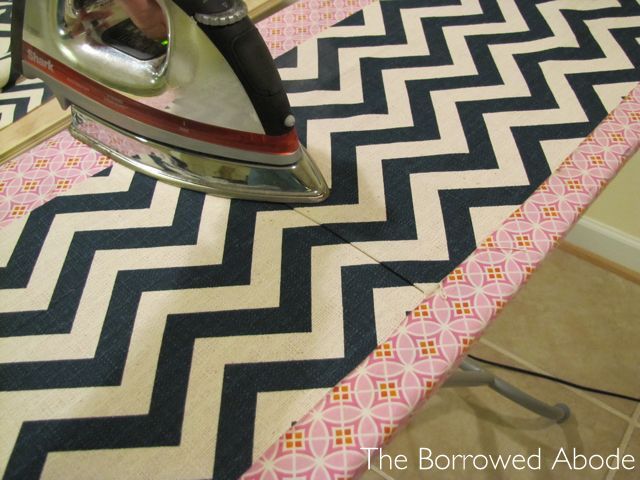
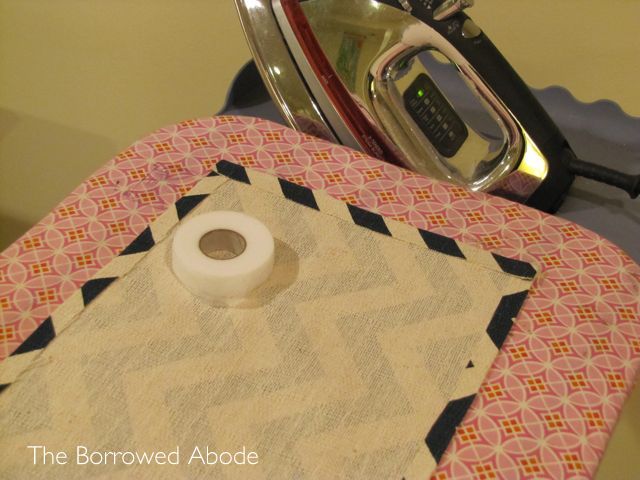
2. Hem the edges, to prevent fraying and create durability, using iron-on hem tape. Just iron your crease, then slip some hem tape inside, and iron (with steam) again. Be sure to check the length before doing the final side hem, making sure that the strip is just long enough to cover the bed rail.
3. Wrap & staple the fabric to the bed rails. I held the strips in place with some painter’s tape, then stapled the top of the fabric to the inside top of the rail. Pulling the fabric taught but not crazy tight around the front and bottom of the rail, I then stapled the bottom to the inside (bottom) of the rail.
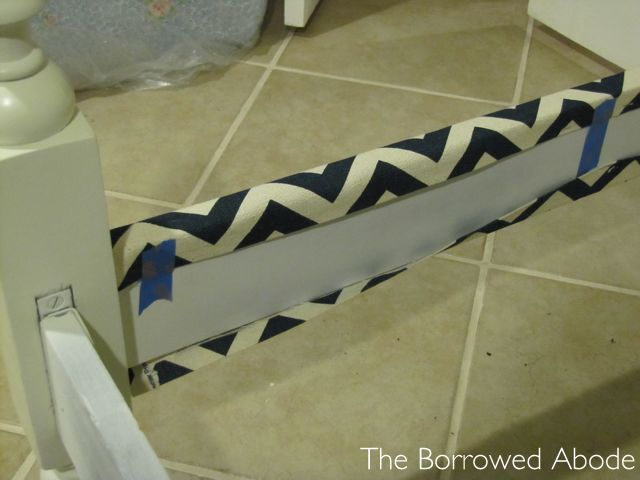
*I applied the staples about 1 inch apart, wanting to be sure the fabric was attached well. Also, I was careful to keep the chevron stripes lined up – I didn’t want them veering across at an angle!
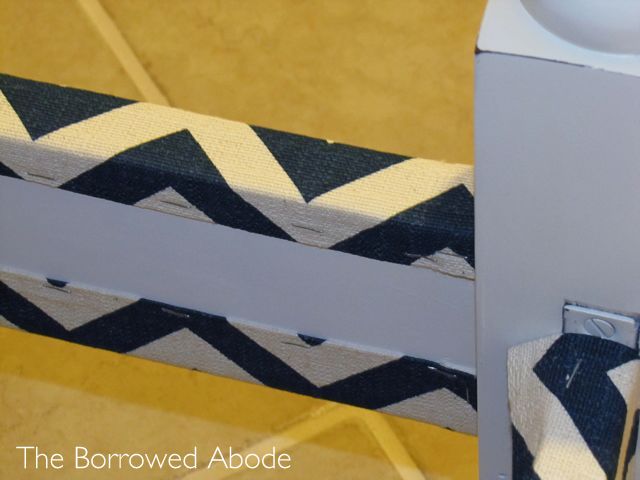
The process took about 2 hours, and really went faster once I got the hang of “staple . . . line up . . . pull taught. . . . staple.”
Once I popped the mattresses in, you couldn’t see the inside rails where the staples were applied. Perfect!
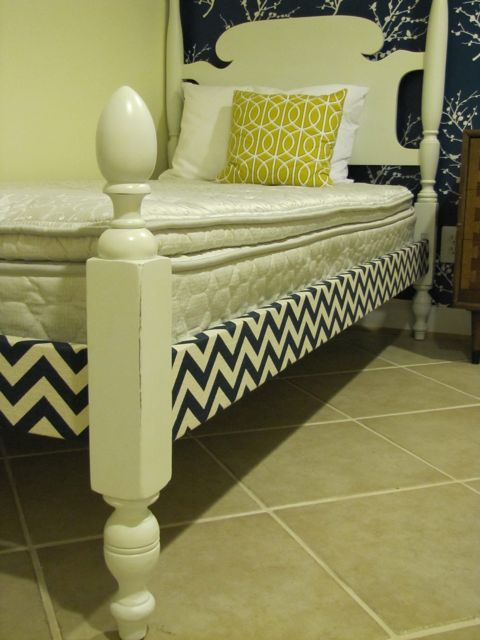
I don’t have bed linens yet (unless you want to see the first sheets I ever slept on) and the light is horrible in these photos, but last night I was too excited about completing the project to wait and photograph them in good light.
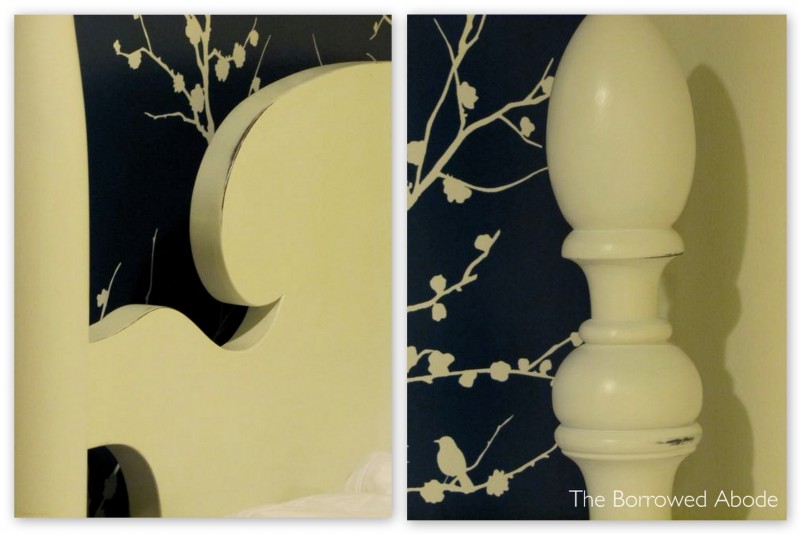
Here’s a little detail: The beds have a slightly distressed paint job, because some of the edges showed through when i did the final stain job. It’s subtle enough that I liked it and kept it.
 The yellow Dwell Studio pillows from my shop are just there so I can see how the warm gold color works with the dark teal of the chevron and the Tempaper accent wall. I like it, and can’t wait to sew some custom pillows and accessories for the space to bring in even more color and pattern. And then I need to find a light paint color for the yellowish-white walls.
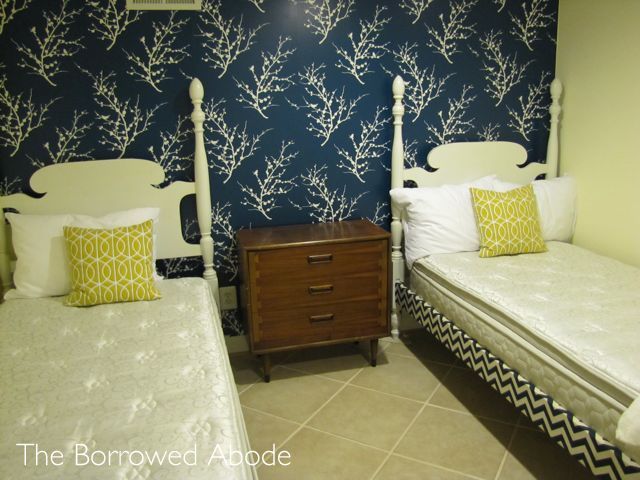
Do you see that mid-century modern cabinet that’s serving as a night stand? I snagged that at Goodwill, and it’s probably going to become a two-toned piece, with white top and sides, and the nice wood face on the front.
So much to do, but I feel like the hardest, most time-intensive project is behind me. From here on out, it’s all about adding the fun stuff!
Do you like the patterned bed rails, or would you prefer a more solid look in your home? I’m stoked; the chevron fabric-upholstered sides really give the beds a custom look. And changing the look is as simple as pulling out the staples and wrapping them with new fabric.
Approximate Cost: $75 (fabric, paint, sealer, sanding sponges)
Approximate # Hardware Store Trips: 7
Approximate time to completion: 3 months, but who’s counting?
You know what? In my almost three years of home blogging, this is the first time I’ve painted a piece of furniture white. Can I get my “Official DIY Blogger” badge now?
***I am most definitely sharing this project over at Thrifty Decor Chick’s Spring Paint Party!!


29 Comments
I approve of painting the antiques and doing something fun with them. I grew up with the “ACK, don’t PAINT it, it is REAL WOOD. And an ANTIQUE!!!” method of redoing furniture. Which is not as fun as you think it is. Restaining, I mean. I think those look beautiful.
I had the same thing beat into me when I was younger. But a) you’ve gotta make it beautiful and useful for YOU, not just follow random rules. Second, these guys weren’t in great shape when I sanded them down, and they definitely needed paint to be made good again. Thanks!
This looks great! I am wondering where you found the chevron fabric and what weight it is? I am thinking about doing something like this to the outside of my box spring, and it looks perfect. I don’t have a good feel for mixing patterns yet, but thanks for the great inspiration in this room!
Hi Laura! Thanks so much! The fabric is from Premier Prints, and it’s under ZigZag. It’s called “Titan Birch” and is a very dark teal, which is hard to convey in photos.
I think a key for mixing patterns is to have balance. I.e. a large-scale print mixed with a small one. Opposites. If you mix things that are too similar (i.e. striped fabric as well as chevron fabric, or small florals in two different prints) I think it is hard to achieve that balance.
They look great! That is such a great idea. And it doesn’t require sewing so it’s something that I could actually do.
Jane, these look amazing! I never would have thought to do the chevron fabric like that, but I think it looks amazing. I especially love the mix of neutral patterns. You’re so creative! 🙂
This is totally amazing! I LOVE everything about where you’re going with this room. Be proud! You are killing it! 🙂
Thanks Abby! I’m definitely stoked. And I’m glad I’ve taken so long to work on this project, because it’s given me a lot of time to think about what I want to do.
I LOVE this room! So creative and wonderful for us fellow renters to see! I would never have thought to put fabric on the frames, but it’s great. I can’t wait to see the next steps/finished product. Kudos!!
Thanks! I’m really liking how it turned out.
Very nice! It’s all coming together. 🙂 I don’t think I could have kept all that chevron straight when stapling it on. You did a great job. And uh, I need to go Goodwill hunting (see what I did there?) with you! I never find neat Mid-Mod stuff!
Please note: I *very rarely* find cool vintage stuff when thrifting. Our stores here are so over-shopped it’s crazy. But once in a while I do get lucky. I think going often is the key.
Oh I love it. The room looks great so far! Can’t wait to 1) see the finished product and 2) I love that there is no bed skirt… it looks so clean!
Yes! I forgot to mention that. I was excited that it meant I didn’t need a bedskirt. They just trap dust bunnies, in my opinion.
The room will be ready and waiting for you if you ever visit the DC area! 🙂 I just need to get working on a crib or two.
SO, so awesome! Love how this room is coming together.
What a fantastic job you’ve done! They look fantastic. I am so impressed you have time to DIY with all you’ve got going on! I admire all the care you took to make these look so fantastic. Lining up all those chevron lines is not easy. Well done.
The problem is, I’ve been making time to DIY. I probably should have worked on wedding projects instead. It’s just that I couldn’t deal with all these unfinished winter projects, they had to be taken care of. STAT. This is probably the last bit of work I”ll do on the guest room (aside from buying sheets) until after the wedding.
ALso, I got maybe 5 hours of sleep a night last week, then crashed this weekend. So maybe it’s best if I don’t repeat this pattern again!!
Are you kidding me?? This is AWESOME! I love, love, love the chevron, especially with the wallpaper.
I’m a year behind, but I’m suddenly mad about chevron. 🙂 Thank you!
This is SUCH a great idea! I must do!
Brilliant! I love the pattern on the rails! If only I didn’t have to hide junk under my bed…. and I had thick side rails. I can’t wait to see the smaller details come together.
I wonder. . . maybe you could get boards that were wide enough to go all the way to the ground from your current bed rails, then cover the boards in fabric and attach them to the siderails? In a way that would let you move a board to grab stuff from under the bed? Just a crazy idea. 🙂
I’ve been reading your blog for a while, but this is the first time I’ve commented. This redesign is awesome! I love that you added the chevron fabric to the beds, and the wallpaper is beautiful!
Thanks so much for commenting, Audrey, and thanks for the kind words! 🙂 The fabric is a dark teal Zig Zag by Premier Prints, and you can order it from Fabric.com
I seriously love this! I have been wanting to do something similar to the twin beds in the boy’s bedroom but they are steel… I wonder how long the tape would hold the fabric since I can’t staple… Your beds turned out divine! The whole room is pulling together so nicely, I can’t wait to see more! <3
xoxo,
Jen
[…] basement guest room is progressing very slowly. I still need to buy sheets for the beds, but I am not sure exactly […]
This room looks amazing and I love the chevron. However, painting that amazing vintage cabinet would seriously be a crime. I am all for redoing antiques to make them your own and I love what you did to the beds, but that made sense for the space. BUT THAT CABINET IS AMAZING AS IS! Why fix what isn’t broke?
Love the rails!
[…] And with that, the three-month bed painting process completed. The side rails still weren’t finished, but I had special plans for them. You’ll find all the details for that in the next post. […]